-
![]()
Daisy
Daisy is the Senior editor of the writing team for EaseUS. She has been working in EaseUS for over ten years, starting from a technical writer to a team leader of the content group. As a professional author for over 10 years, she writes a lot to help people overcome their tech troubles.…Read full bio -
Jane is an experienced editor for EaseUS focused on tech blog writing. Familiar with all kinds of video editing and screen recording software on the market, she specializes in composing posts about recording and editing videos. All the topics she chooses …Read full bio
-
![]()
Melissa Lee
Melissa is a sophisticated editor for EaseUS in tech blog writing. She is proficient in writing articles related to screen recording, video editing, and PDF file conversion. Also, she's starting to write blogs about data recovery, disk partitioning, data backup, etc.…Read full bio -
Jean is recognized as one of the most professional writers in EaseUS. She has kept improving her writing skills over the past 10 years and helped millions of her readers solve their tech problems on PC, Mac, and iOS devices.…Read full bio
-
![]()
Jerry
Jerry is a fan of science and technology, aiming to make readers' tech life easy and enjoyable. He loves exploring new technologies and writing technical how-to tips. All the topics he chooses aim to offer users more instructive information.…Read full bio -
Larissa has rich experience in writing technical articles. After joining EaseUS, she frantically learned about data recovery, disk partitioning, data backup, screen recorder, disk clone, and other related knowledge. Now she is able to master the relevant content proficiently and write effective step-by-step guides on various computer issues.…Read full bio
-
![]()
Rel
Rel has always maintained a strong curiosity about the computer field and is committed to the research of the most efficient and practical computer problem solutions.…Read full bio -
![]()
Gemma
Gemma is member of EaseUS team and has been committed to creating valuable content in fields about file recovery, partition management, and data backup etc. for many years. She loves to help users solve various types of computer related issues.…Read full bio
Page Table of Contents
Melissa Lee
Updated on Feb 06, 2024
0 Views |
0 min read
Looking for a way to record the Zoom audio? Maybe you are a student who needs to record a Zoom lesson and review it after class. Recording the audio can take little space on your device than recording the video. Or, maybe you are a staff who can't join the meeting and need to listen to the content when you have time. No matter what, you need a Zoom audio recorder to record the content for you.
Although Zoom itself offers the option to record meetings, you can only access this feature if the host gives you permission. Therefore, using some free Zoom recording software or apps turns out to be your best choice. In this article, we are going to show you how to record Zoom audio with the Zoom function and with some other audio recorders.
PAGE CONTENT:
1. EaseUS RecExperts
As we said before, Zoom will give you many limitations if you want to record audio in it. If you need a Zoom audio recorder without limitations, you may try EaseUS RecExperts. This is screen recording software that can record audio during a Zoom meeting. If you want to record the screen of a Zoom meeting at the same time, you just need to choose the record screen function.
Besides, if you need to record gameplay when playing an interesting game, you just need to run the game and record the gameplay screen with this tool. The webcam can also be recorded with EaseUS RecExperts, inbuilt or external. After recording, you can even edit the videos saved. More importantly, you can edit or delete the video content frame by frame.
Features:
- Record the system audio in one click
- Record the microphone sound or not
- Record Zoom screen and audio at the same time
- Mute the recording without muting the video recorded
- Modify the sound volume before and during recording
Now, click on the button below to download the tool and follow the steps below to record Zoom audio. Note that before recording, you need to join the Zoom meeting first.
Step 1. Launch EaseUS RecExperts and choose "Audio" (looks like a speaker) from the left side of the interface. Select the sound source by clicking on the speaker sign (the system sound) or the mic sign (the microphone). Or, you can record them both at the same time.

Step 2. Hit "REC" button to start recording audio. To finish it, you just click on the red square icon to stop the recording.

Step 3. After that, the recording list window will pop up automatically. You can listen to or edit the recording with built-in tools.

2. Zoom Local Recording Function
The easiest way of recording Zoom audio should be recording within Zoom. In this way, you don't need to download anything or go to any online website. In fact, Zoom allows its users to record audio with its inbuilt functions. However, there are some prerequisites. For instance, you need to enable local recording first.
Even so, your recording will be limited. You can't record Active Speaker, Gallery View, and shared screen in the meantime; you can't record using the iOS or Android app; you can't transcript the audio, etc. However, if you don't mind these, you can follow the tutorial below to make preparations and record Zoom audio with the local recording function.
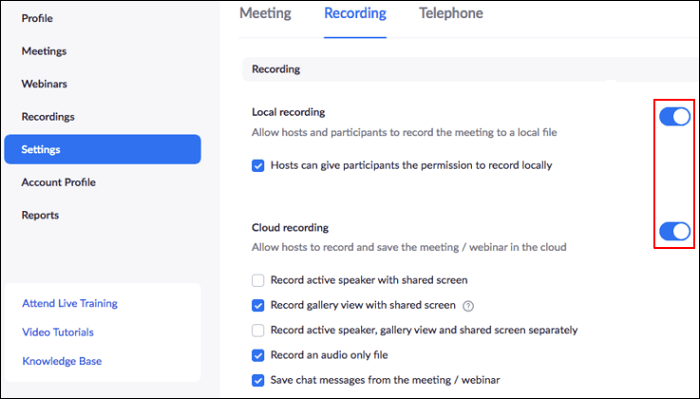
Preparation: Enable Local Recording in Zoom:
Step 1. Sign in to the Zoom. And click "Settings" in the navigation menu.
Step 2. Click the "Recording" tab. Toggle on the "Local Recording" function.
Step 3. If a verification dialog appears, click "Turn On" to verify the change. If the option is grayed out, contact your Zoom administrator.
Record Zoom Audio Step by Step:
Step 1. Start a Zoom meeting as the host and click "Record".
Step 2. If there is a menu, select "Record on this Computer". After a recording has been started, click "Pause" or "Stop Recording" at the bottom.
Step 3. After recording, Zoom will convert the recordings so you can access the files.
Step 4. Once the conversion process is complete, the folder containing the recording files will open.
3. Windows 10 Game Bar
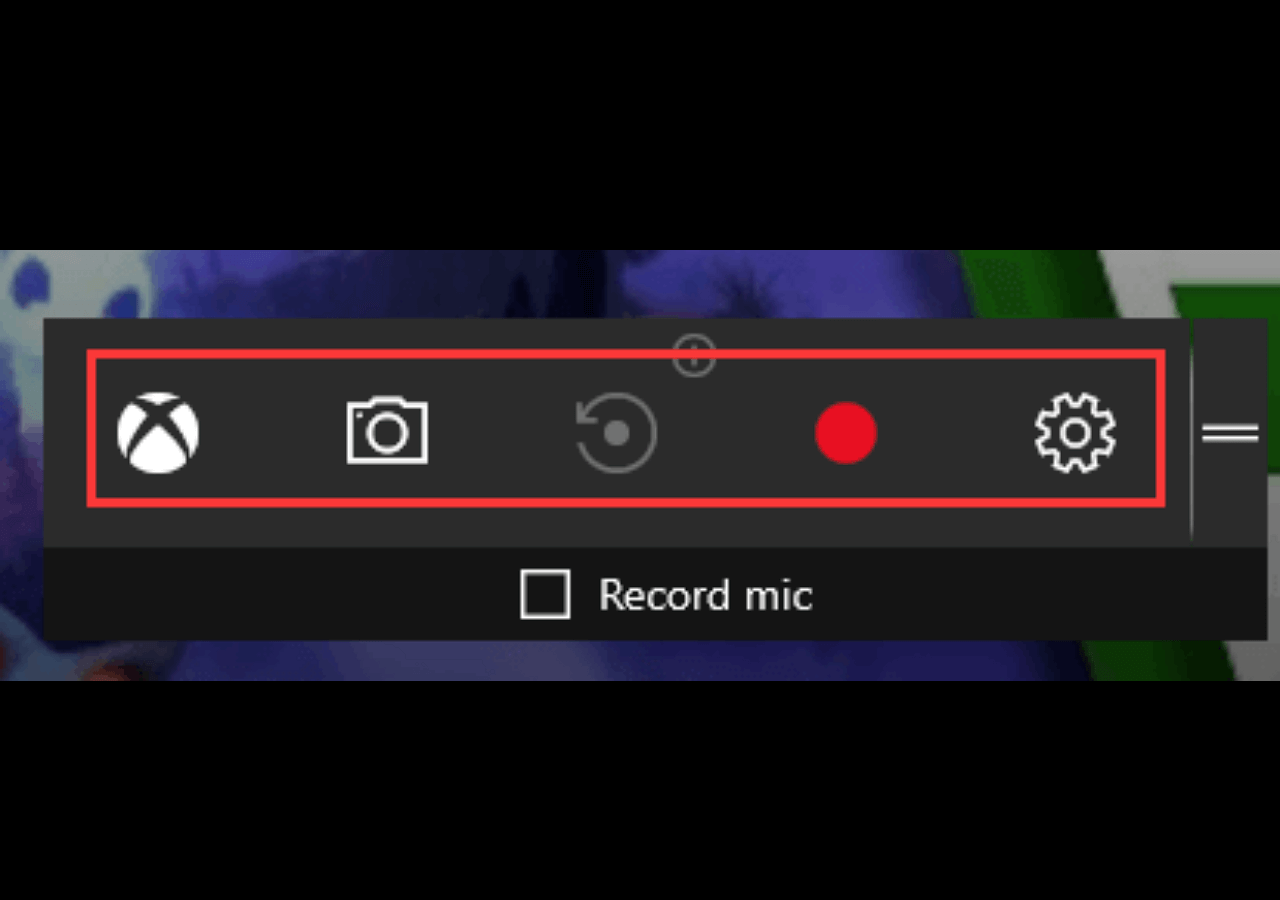
If you are using a Windows 10 PC, you don't have to install any third-party app since Windows 10 already features a program that enables you to capture the computer screen and audio. The inbuilt recorder is called Game Bar. Although the name suggests that it is designed to record video games, you can also use it to record any other program like Zoom. The operation is quite simple. We listed the steps of recording Zoom audio with Game Bar below. Let's have a look.

Step 1. Open the Zoom meeting window that you want to record from.
Step 2. Press the "Windows" and "G" keyboard buttons at the same time to awake the Game Bar. Remember to enable the audio recording option since you want to record sound here.
Step 3. Click on the "Record" button to start recording. Click on the "Stop Recording" button to end it. After that, go to the folder in which the video file was saved.
4. QuickTime Player
If you are a Mac user, you should have known about QuickTime Player. Recording a Zoom meeting from a Mac computer is easy because you can just use the inbuilt tool. Once the app runs on your computer, you can start recording Zoom audio. However, QuickTime Player offers the recording of a fixed screen range. If you want to customize the recording area, it's impossible. Also, the frame rate at which the video is going to be captured can't be customized, either. If you only need to record the audio, then you don't need to worry about that. Just follow the steps below to record Zoom audio with it.
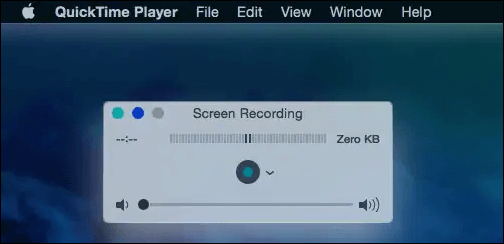
Step 1. Run QuickTime Player on your Mac, go to the "File" menu, and choose the "New Screen Recording" option from the menu.
Step 2. Go to "Settings" and adjust the quality at which your audio is going to be captured and specify the location where the file is going to be saved.
Step 3. Click on the "Record" button to start recording. When you want to stop recording, click on the "Stop Recording" button.
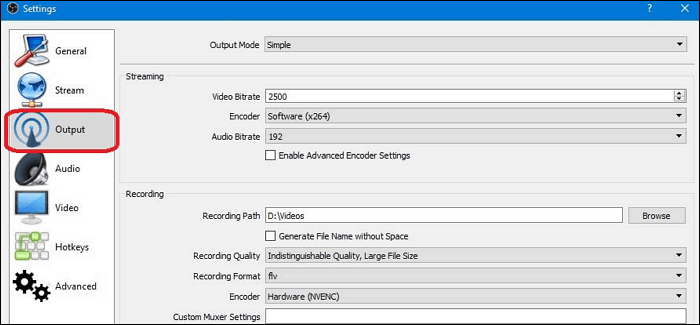
5. OBS Studio
OBS Studio is an open-source tool that can record the screen and audio on your device. Capturing a Zoom meeting with OBS is totally free. It allows you to record system audio only, record sound from a microphone only, or record both at the same time. Also, OBS supports recording from many different platforms. Zoom is also included. If you want to use this software, just follow the tutorial below.
Step 1. Run OBS, go to the "Sources" menu, and click on the "+" icon. Then, choose the "Window Capture" option.
Step 2. When the "Create/Select Source" window appears on your screen, name the new source and click on the "OK" button.
Step 3. Click on the Window drop-down menu after the "Properties" window pops up, select "Zoom" from the list and click "OK" to confirm the changes.
Step 4. Click on the "Start Recording" button in the "Controls" tab and continue with your Zoom meeting. After recording, you can access your files by selecting the "Show Recordings" option from the "File" menu.
6. iPhone Built-in Recorder
Zoom doesn't support you to record audio locally from a mobile device unless you are using the paid version. Therefore, if you haven't purchased any of Zoom's plans and you want to record Zoom audio on your iPhone, you will need a recorder. Luckily, iPhone has a built-in screen recorder that can record the Zoom meeting on your phone easily. Usually, it is added in the Control bar. You can find it with a simple swipe of your iPhone screen. If not, you may add it to the Control bar before recording.

Step 1. Open the "Control Center", and click on the green "+" sign before "Screen Recording" to add the function to the Control bar.
Step 2. Join the Zoom meeting you want to record and click on the red recording sign and run the screen recorder. It will start recording after count-down.
Step 3. When you want to stop recording, click on the recording sign again. The file recorded will be saved to your album.
Conclusion
In this article, we give you information on the top six Zoom audio recording apps. There are both inbuilt ones and third-party ones. Also, we showed you the detailed steps of recording Zoom audio with these tools. All you need to do is to choose the one that suits you and start recording. If you are using a Windows computer, we recommend you download and use EaseUS RecExperts right now.
EaseUS RecExperts

One-click to capture anything on screen!
No Time Limit, No watermark
Start Recording