-
![]()
Daisy
Daisy is the Senior editor of the writing team for EaseUS. She has been working in EaseUS for over ten years, starting from a technical writer to a team leader of the content group. As a professional author for over 10 years, she writes a lot to help people overcome their tech troubles.…Read full bio -
Jane is an experienced editor for EaseUS focused on tech blog writing. Familiar with all kinds of video editing and screen recording software on the market, she specializes in composing posts about recording and editing videos. All the topics she chooses …Read full bio
-
![]()
Melissa Lee
Melissa is a sophisticated editor for EaseUS in tech blog writing. She is proficient in writing articles related to screen recording, video editing, and PDF file conversion. Also, she's starting to write blogs about data recovery, disk partitioning, data backup, etc.…Read full bio -
Jean is recognized as one of the most professional writers in EaseUS. She has kept improving her writing skills over the past 10 years and helped millions of her readers solve their tech problems on PC, Mac, and iOS devices.…Read full bio
-
![]()
Jerry
Jerry is a fan of science and technology, aiming to make readers' tech life easy and enjoyable. He loves exploring new technologies and writing technical how-to tips. All the topics he chooses aim to offer users more instructive information.…Read full bio -
Larissa has rich experience in writing technical articles. After joining EaseUS, she frantically learned about data recovery, disk partitioning, data backup, screen recorder, disk clone, and other related knowledge. Now she is able to master the relevant content proficiently and write effective step-by-step guides on various computer issues.…Read full bio
-
![]()
Rel
Rel has always maintained a strong curiosity about the computer field and is committed to the research of the most efficient and practical computer problem solutions.…Read full bio -
![]()
Gemma
Gemma is member of EaseUS team and has been committed to creating valuable content in fields about file recovery, partition management, and data backup etc. for many years. She loves to help users solve various types of computer related issues.…Read full bio
Page Table of Contents
Jane Zhou
Updated on Apr 11, 2024
0 Views |
0 min read
A timelapse video condenses the changes in a relatively long term into a short video. Thus you can easily obtain a lot of information from it. In our daily life, people usually use digital cameras to take numerous pictures or short videos and merge the clips to restore the whole process of change. To make it more smooth, people also need to speed up their works.
But when you want to make a time-lapse video of the changes on your computer screen, what should you do? First and foremost, a competent timelapse screen recorder is necessary. This post will introduce the top 5 time lapse screen recorder on Windows 10 and Mac and give you detailed tutorials about using the recorder to make a wonderful timelapse video.
Top 5 Timelapse Screen Recorder on Windows and Mac:
- >> EaseUS RecExperts for Windows
- >> Debut Video Capture Software
- >> Bandicam
- >> EaseUS RecExperts for Mac
- >> OBS Studio
Top 1. EaseUS RecExperts for Windows
Applies: Windows 11/10/8/7
This is a powerful screen recording software for time lapse recording. First of all, it gives you the ability to choose the recording region flexibly. For instance, you can capture the full screen or record part of screen.
Moreover, this Windows 10 timelapse recorder can schedule recording, which makes it possible to record short videos at certain intervals automatically. Then, you can merge those clips into a timelapse video. All you need to do is add a new task and set the start time as well as duration. After that, the recording task will begin and stop automatically. The auto split is also helpful for you, and the video will be split when the recording time reaches the preset time.
Main Features:
- Choose the recording region freely
- Record desktop audio and audio from the microphone
- The built-in video trimming tool is available
- Record green screen Webcam
You are also able to customize the frame rate or the video solution to improve the video quality. Download this timelapse screen recorder and capture interesting things now.
Steps to Record Timelapse Video Clips:
To make a timelapse video of your screen, the first thing is to record material clips.
Step 1. Create a Timed Recording Task
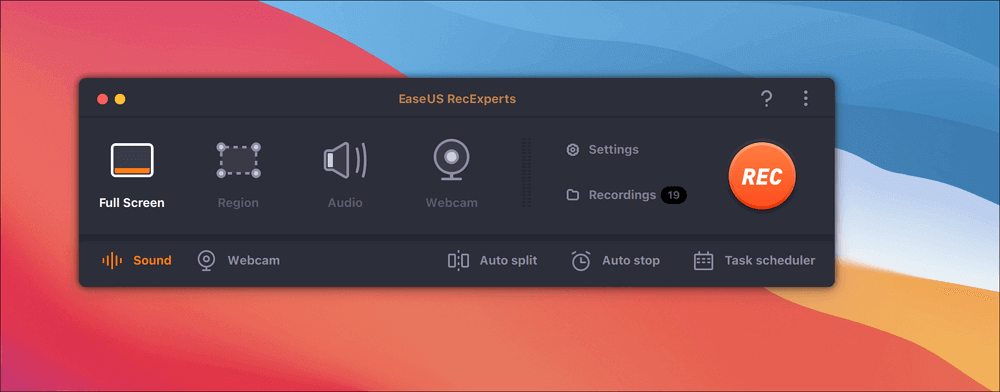
Download and launch the screen recorder on your computer. Then, click "Task Scheduler" at the bottom right of the main interface.

Then, select the "New Task" option to add a new schedule to the program.

Step 2. Configure the Scheduled Recording Task
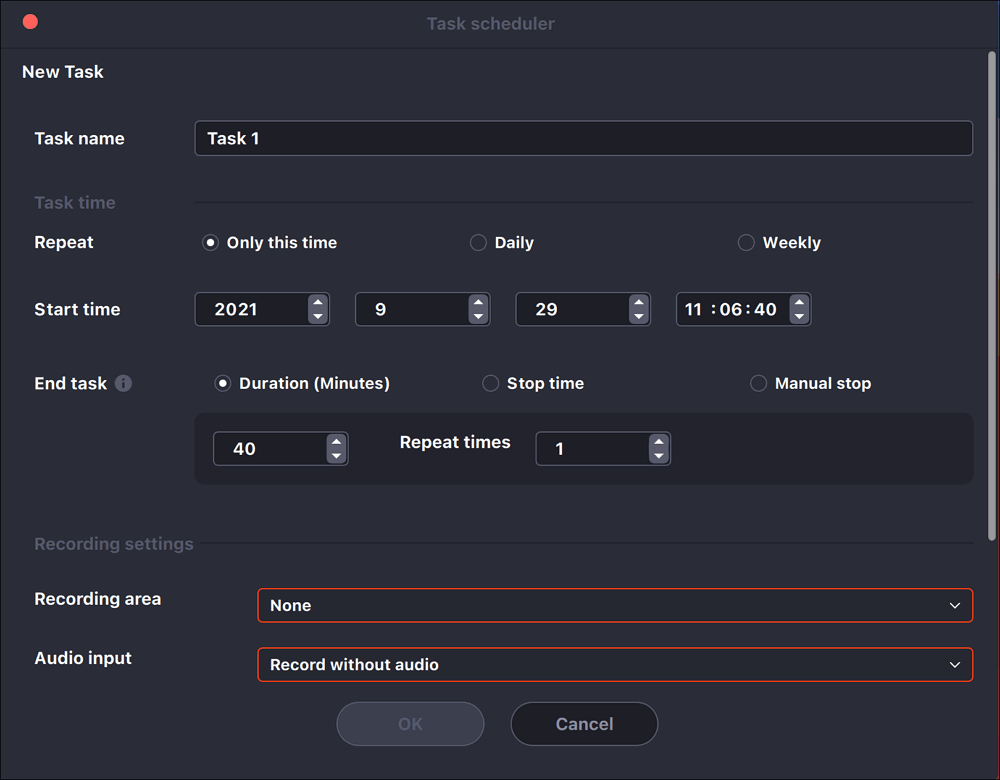
On the following screen, you need to set a task name and define how your screen should be recorded.

- In the "Task time" tab, specify a start time and select an end time.
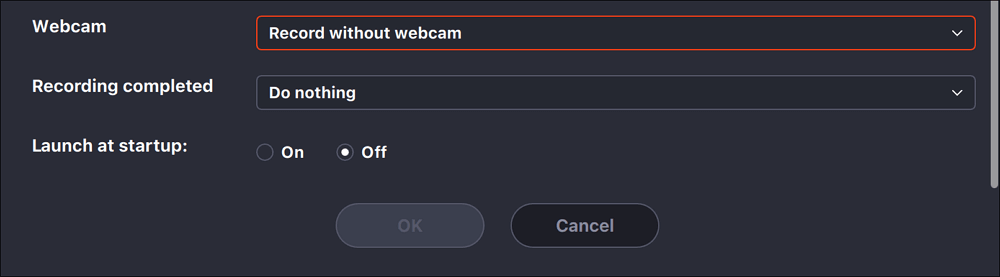
- In the "Recording setting" tab, select the recording area, choose the audio input, and specify other options. Then hit "OK".
Step 3. Edit or Delete a Scheduled Recording
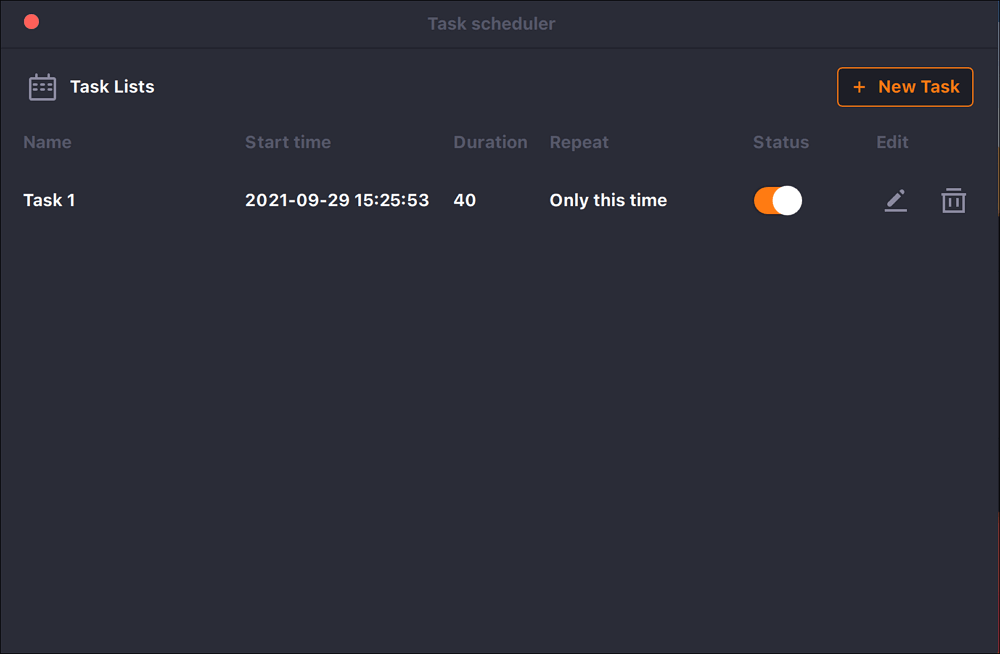
If you change your mind and you would like to edit the scheduled recording time or other options, or if you would like to delete the schedule altogether, you can do so easily. Get back to the "Task Scheduler" screen and click on either the "Edit" or "Delete" icon.

Step 4. View Your Scheduled Screen Recordings
Once your scheduled time has passed, the software will capture and save your screen recording video file automatically. You can access this file by clicking on the "Recordings" option on the main interface. All of the recordings that you make using this tool are saved here.

After that, you can do anything unwanted using the built-in video editing tool. Then, you need to find a specialized video editing program - such as EaseUS Video Editor- to speed up other videos. When you consider the work can satisfy your need, export it to your device as a whole time-lapse video.
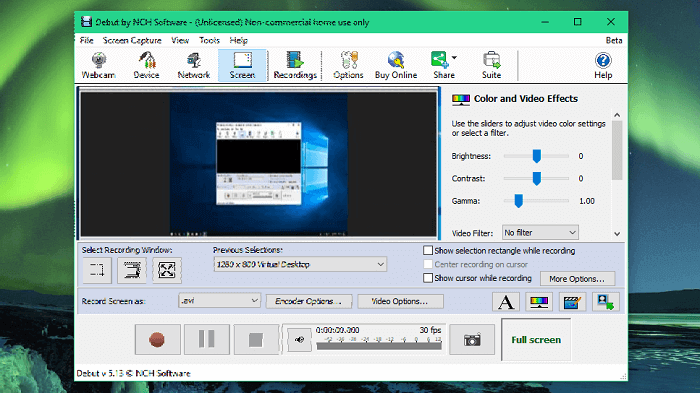
Top 2. Debut Video Capture Software
This is also a versatile timelapse recorder on Windows that can help you record videos and audio from many sources like screens, Webcam, and even VHS tapes.
Its powerful video processing tool enables you to customize many settings, such as the video color and the solution. You can add filters to your recordings during the recording, the same as adding text caption.
In addition to recording a timelapse video of what happens on your screen, you can also record with an internal or external camera. This feature greatly expands its range of applications. And Debut Video Capture Software supports many common video formats, including MP4, MOV, and AVI.
Features:
- Support setting keyboard hotkeys
- Show mouse cursor in the recording
- Freely create snapshots of a video
- Support scheduling the screen recording
Steps to Record with Time-lapse Software Free:
Step 1. Launch Debut Video Capture Software and select the recording window.
Step 2. Click the "Video Options" button and tick the box before "Enable Time-lapse."
Step 3. Set the frequency of the recording by changing the number after "Capture One Frame Every:"
Step 4. Click the little red spot icon to start the recording.
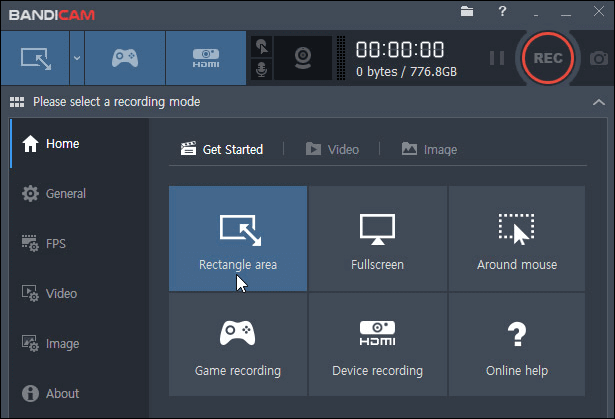
Top 3. Bandicam
This is one of the best time lapse apps on Windows, and you can use this screen recorder on many occasions. For instance, you can capture the video with system sound or record the gameplay on different platforms. It's compatible with various external devices like Xbox, PlayStation, etc.
For users who want to record instructional videos, it's beneficial to draw signs and add marks to make the contents more comprehensible. If there is something of importance, a cursor with mouse effects will enable you to emphasize it.
If you want to use this recorder as timelapse video software, its schedule recording function is indispensable. You can record several short videos at intervals and put them together using some third-party video editing tools.
Features:
- Support making chroma key videos in real-time
- Support adding Webcam overlay
- Schedule recording to start the recording automatically
- Record system audio and your voice simultaneously
Steps to Record with Timelapse Recorder:
Step 1. Launch Bandicam and choose a suitable recording mode.
Step 2. Click the "Scheduled Recording" icon, which looks like a timer on the top, and click on the "Add" button to add the recording task.
Step 3. Set the start and end time of the scheduled recording and click the "REC" button to get started.
After you recorded all the necessary clips, you should import them into a video editing program and arrange those clips according to chronological order. Then, speed them up and export the footage as a complete time-lapse video.
Top 4. EaseUS RecExperts for Mac
EaseUS RecExperts for Mac is featured by its simple and user-friendly interface and lightweight. You will get familiar with its functions very quickly, and even you never use a screen recorder before. You can record streaming video, audio, and even webcam with only a few simple steps.
This screen recording software supports scheduling recording to record some videos in succession and you can integrate them to make a timelapse video. It's worth noting that, this recorder comes with a built-in video/audio trimming tool that can remove unnecessary clips for you.
Key Features:
- Fully support recording 1080P/4K videos
- Record internal audio Mac without any add-on software
- Support more than 10 formats
- Excellent screen and audio recorder
- Offer built-in video trimmer
If you want to save your memories and turn them into a timelapse video, this recorder is a helpful tool. Download it and try to take a time lapse video by yourself now.
Steps to Use Time Lapse Software Mac:
Follow this guide to record a timelapse video of your screen now.
Step 1. Launch EaseUS RecExperts for Mac and click on the "Task scheduler" button at the bottom right corner.
Step 2. The "Task scheduler" window will pop up, and you can click on the "+ New Task" button to create a recording task. Then, this software will start this recording task automatically.

Step 3. There are many options for you to adjust the settings, such as the start time, duration of the task, or the stop time of the recording. Besides, you need to choose the recording area (full screen or part of screen) and decide record with/without a microphone and a webcam.
Click on "OK" to confirm your decisions.
Step 4. Then, you can see the task in the "Task Lists." This software allows you to edit the task and change the settings before it begins.
Get obtain all the video footage you need, follow this post to merge those clips and make them a time-lapse video. >> How to Megre Video Clips.
Top 5. OBS Studio
OBS Studio is popular among users who like to make videos by recording videos and audio on their computers. This is an open-source time lapse software that can run on Windows, Mac, and Linux, so you don't need to worry about its compatibility.
Though its interface is relatively complex for novice users, if you get familiar with its functions and shortcuts, this program can meet most of your needs to record screens and stream live.
The easy-to-use configuration options allow you to customize your recordings freely to obtain exactly what you want to record using this time-lapse software which is open source. Plus, it also helps you capture online video conferences, you can try it if you don't know how to record Zoom meeting without permission.
Features:
- Record videos in high resolution
- Support adding transitions between scenes
- Support real-time video/audio capturing and mixing
- Support setting many keyboard shortcuts
Steps to Use OBS Timelapse:
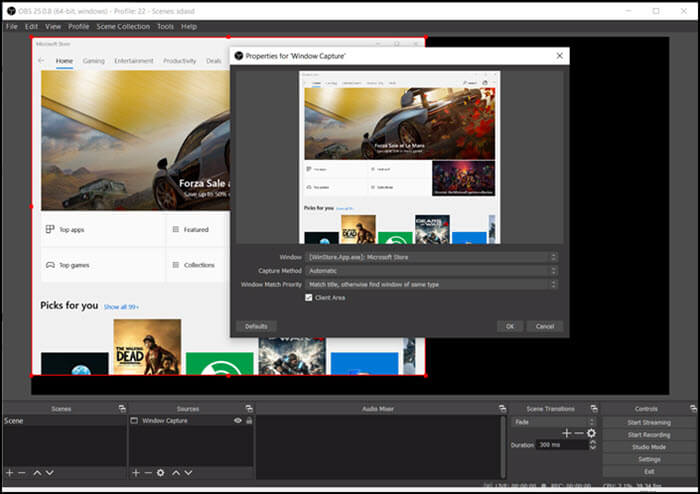
Step 1. Launch OBS Studio and click the "+" icon under the "Sources" tab and choose what you want to record as the source. If you want to record the full screen, choose "Display Capture."
Step 2. Click on the "Tools" option on the top of the main interface, and select "Output Timer." Then you can set the end time of your recording and click the "Start" to record.
Step 3. Click the "Stop Recording" on the main interface's right side if you want to stop it. Otherwise, it will stop recording at the end time you set before.
Conclusion
We talked about the best 5 timelapse screen recorder in this post, and you can download the most appropriate one based on the instruction above. But among all those timelapse screen recorders, EaseUS RecExperts is the most rich-featured one since it offers you both a powerful screen recording tool and a basic video editing tool.
Don't hesitate to try this time lapse screen capture software, which is versatile and helpful. And you can click on the button below to download it.
EaseUS RecExperts

One-click to capture anything on screen!
No Time Limit, No watermark
Start Recording