-
![]()
Daisy
Daisy is the Senior editor of the writing team for EaseUS. She has been working in EaseUS for over ten years, starting from a technical writer to a team leader of the content group. As a professional author for over 10 years, she writes a lot to help people overcome their tech troubles.…Read full bio -
Jane is an experienced editor for EaseUS focused on tech blog writing. Familiar with all kinds of video editing and screen recording software on the market, she specializes in composing posts about recording and editing videos. All the topics she chooses …Read full bio
-
![]()
Melissa Lee
Melissa is a sophisticated editor for EaseUS in tech blog writing. She is proficient in writing articles related to screen recording, video editing, and PDF file conversion. Also, she's starting to write blogs about data recovery, disk partitioning, data backup, etc.…Read full bio -
Jean is recognized as one of the most professional writers in EaseUS. She has kept improving her writing skills over the past 10 years and helped millions of her readers solve their tech problems on PC, Mac, and iOS devices.…Read full bio
-
![]()
Jerry
Jerry is a fan of science and technology, aiming to make readers' tech life easy and enjoyable. He loves exploring new technologies and writing technical how-to tips. All the topics he chooses aim to offer users more instructive information.…Read full bio -
Larissa has rich experience in writing technical articles. After joining EaseUS, she frantically learned about data recovery, disk partitioning, data backup, screen recorder, disk clone, and other related knowledge. Now she is able to master the relevant content proficiently and write effective step-by-step guides on various computer issues.…Read full bio
-
![]()
Rel
Rel has always maintained a strong curiosity about the computer field and is committed to the research of the most efficient and practical computer problem solutions.…Read full bio -
![]()
Gemma
Gemma is member of EaseUS team and has been committed to creating valuable content in fields about file recovery, partition management, and data backup etc. for many years. She loves to help users solve various types of computer related issues.…Read full bio
Page Table of Contents
Melissa Lee
Updated on Apr 19, 2024
0 Views |
0 min read
There are various reasons to screen record with sound on your iPhone. Maybe you want to record a video call you are having with someone on your device? Or, maybe you want to record a video that is currently being played on your device. But right now, it is time to put aside your specific reasons and focus on finding a handy recorder to achieve this goal. No worries, this guide will solve the problem by explaining how to screen record with sound on iOS devices, along with a recommendation of desirable iPhone screen recorders. Ler's dive in.
How to Screen Record with Sound on iPhone [5 iPhone Recorders]
If you would like to try out other apps to record your iPhone's screen, here are some of the good screen and audio recorder tools you can use with your iOS device. Keep in mind these apps run on your iPhone and not on your computer.
1. The Built-In iPhone Screen Recorder
The iOS devices are all born with built-in recording features, with which you can make whatever kind of recordings with audio on your device. This indigenous tool requires no installation.
To record an event on your iPhone, all you need to do is turn the option on and nothing else. Here are the specific steps to record with the default recorder on iOS devices.

Step 1. Launch the "Settings" app, tap "Control Center," select "Customize Controls," and tap the "Add (+)" sign next to "Screen Recording" to enable the screen recording option.
Step 2. Tap the recording button and record the iPhone Screen.
Step 3. Stop recording and go to the "Photos" app to check your files.
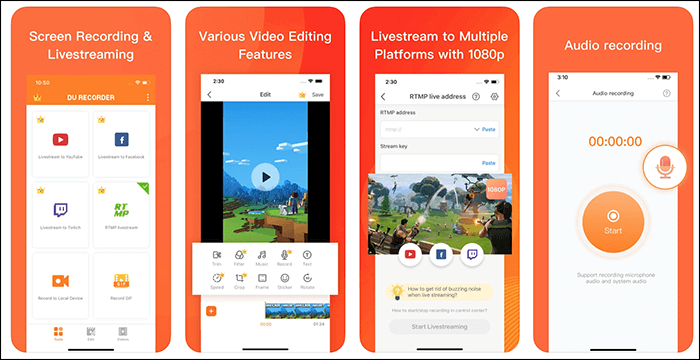
2. DU Recorder
If you have ever looked up the web for a screen recorder, you have likely seen DU Recorder. This screen recording app allows you to record your iPhone's screen with various options. The app is straightforward to use and nicely integrates with the iOS operating system.
This app basically replaces your built-in screen recorder and helps you use the same approach to make new screen recordings. If you are unsure about how to use this app, the following instructions should help you.
Step 1. Add the Recording Option to Control Center, head into "Settings > Control Center > Customize Controls" on your iPhone, and tap the "Add (+)" sign next to "Screen Recorder."
Step 2. Pull up from the bottom of your iPhone's screen and choose the recording option. Then, select "DU Recorder" from the list to use this app for your screen recording.
Step 3. Tapping on that notification will open the panel where you can see your iPhone screen recording.
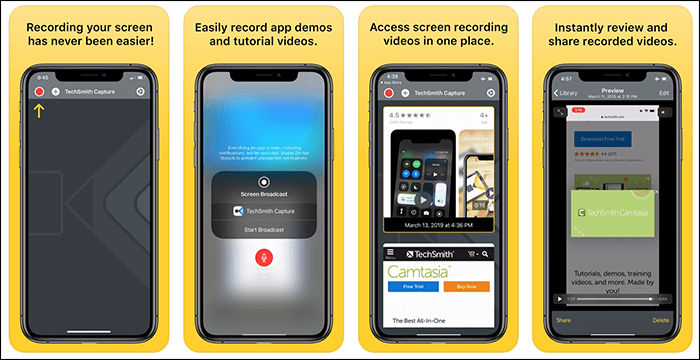
3. TechSmith Capture
TechSmith Capture is a screen recorder that is available for both desktop computers as well as smartphones. With this app on your iPhone, not only can you create some amazing screen recordings, but you can share your videos with other apps easily. This app supports transferring your recordings to the apps on your computer over a WiFi connection.
If you have previously made any recordings with the built-in recorder, you can import them into the app to better manage all your recordings. This makes it easier to find any of your recordings on your iPhone.
Step 1. Turn On iPhone Screen Recording by going to "Settings > Control Center > Customize Controls" on your iOS device and tap the entry that says "Screen Recording."
Step 2. Open the "Control Center" by swiping up from the bottom of your screen. Then, tap the recording option and choose "TechSmith Capture," then, you can set up the options for sounds.
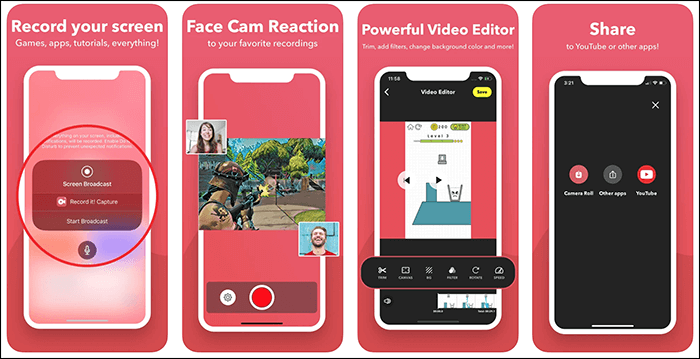
Step 3. Tap the "Start Broadcast" option when you are ready to start recording your screen.
4. Record It
If you want to edit your recordings after making them on your iPhone, Record It is an excellent app for you. This app lets you make screen recordings, and it helps you to edit your videos as well. You can add many items to your videos after being made, and this feature needs no computer interference.
The app integrates with your iPhone like other recording apps, and it is then just a matter of a couple of taps to start a new screen recording.
Step 1. Configure the resolution, bitrate, and framerate for your recording.
Step 2. Tap the large record button in the middle of the screen, press the "Start Broadcast" option, and start recording.
Step 3. Stop recording and edit the footage. You can also share them on other platforms.
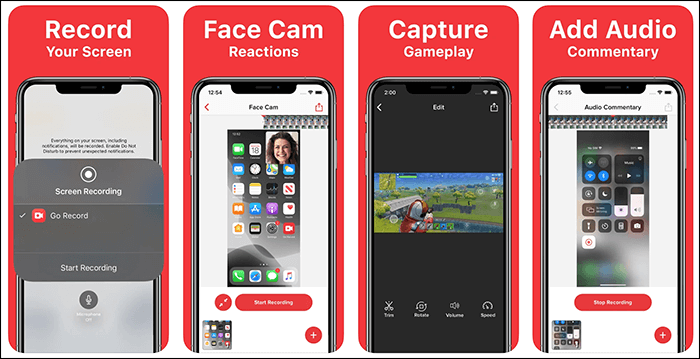
5. Go Record
Go Record enables you to create all kinds of screen recordings on your iPhone and share them across various mediums right from your device. You can use this app to make app tutorials, record your gaming sessions, and even record your video calls. The app offers the ability to record sound from other apps on the device.
You can add your own reactions to your recordings using the face cam feature. This adds a small overlay of the footage coming from your iPhone's front camera. To make your recording experience more intuitive, you need to turn on the notification option so that every time your mission is completed, you will be informed instantly.
Step 1. Head back to the main interface to record your screen.
Step 2. Tap the "Start Recording" button in the top-right corner, enable the mic option, and tap the "Start Broadcast" option to start recording your screen.
Step 3. Tap the "Stop Broadcast" option to stop your screen recording. You can edit or save your video file later.
Bonus Tips: How to Screen Recording on Mac
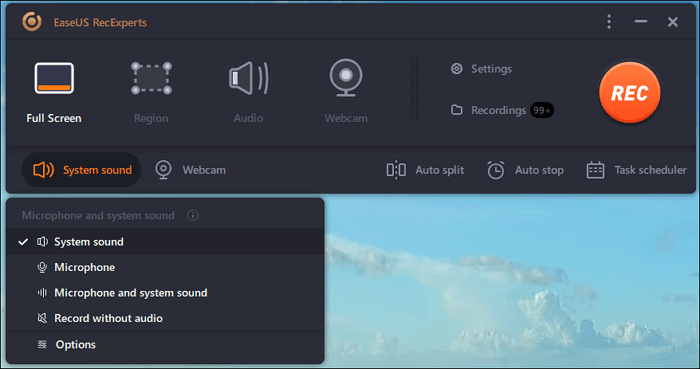
There are many options to capture the screen on Mac, and one of the best tools is EaseUS RecExperts for Mac. It can record the screen, gameplay, audio, and webcam on Mac. One of the benefits is that it can record internal audio on Mac. Also, capturing the screen with audio is accessible.
Key Features:
- Record sound from computer and portable devices
- Support video resolution of 1080p and up to 4k
- This recorder is a wonderful GIF recorder
Download and try this high-quality recorder by hitting the button below:
Record the screen on Mac, using this Windows recording software:
Step 1. Download and launch EaseUS RecExperts on your Mac. To capture the whole screen, click on the "Full Screen" button from the main interface. If you want to customize the recording area, choose the "Region" button.
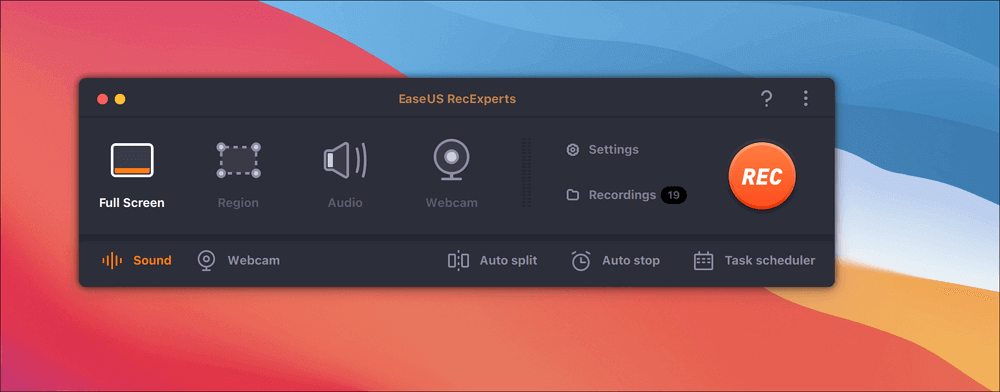
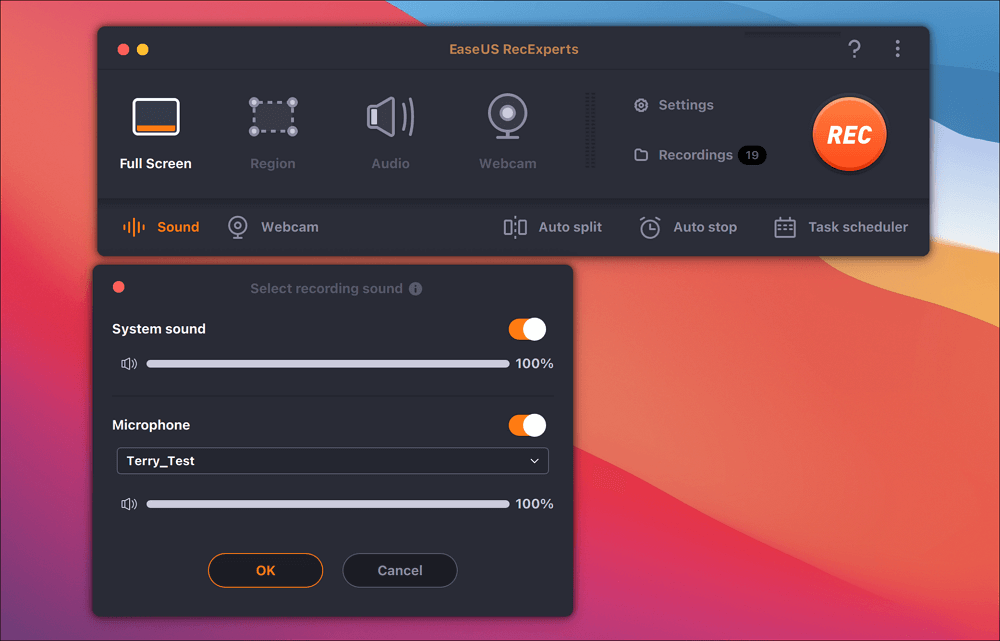
Step 2. To record the screen with audio, hit the Sound icon from the bottom left side of the toolbar. The audio resources can be your external sound or system audio. Based on your needs, enable the target option.
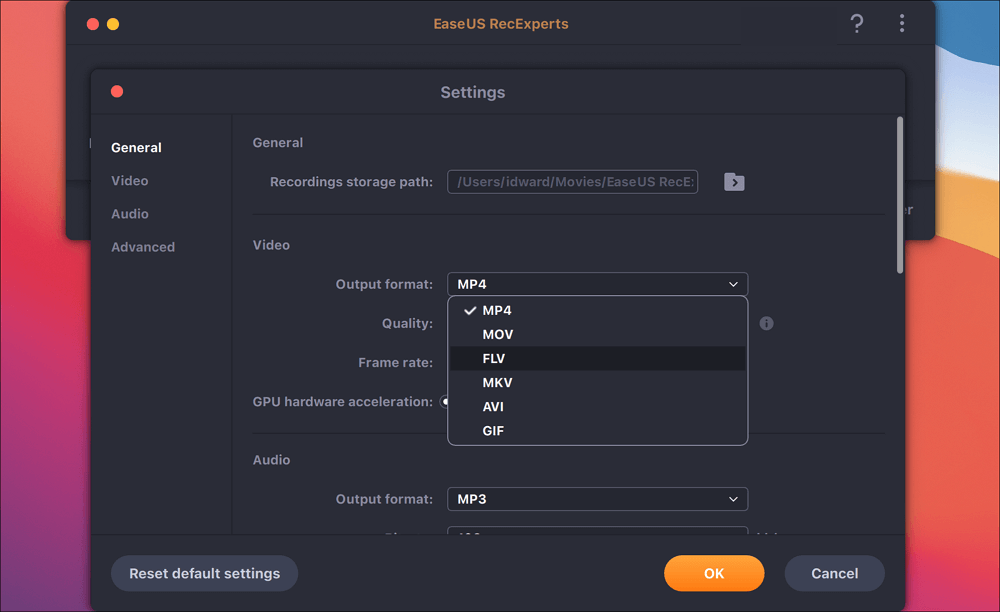
Step 3. Before capturing, you can change the output format of the recorded video by clicking "Settings" from the main interface. Then, scroll down the menu of Output format for Video. Choose the output type as you like.
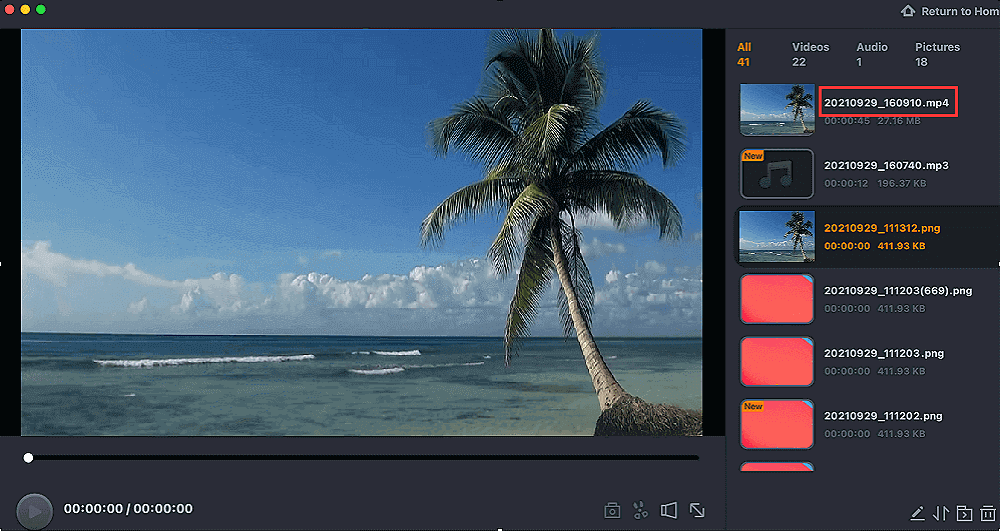
Step 4. Once done, click the REC button to begin recording. It captures anything displayed on your Mac screen. When you are done, click the Stop button. Then you can watch the recorded video from "Recordings".
EaseUS RecExperts

One-click to capture anything on screen!
No Time Limit, No watermark
Start Recording