-
![]()
Daisy
Daisy is the Senior editor of the writing team for EaseUS. She has been working in EaseUS for over ten years, starting from a technical writer to a team leader of the content group. As a professional author for over 10 years, she writes a lot to help people overcome their tech troubles.…Read full bio -
Jane is an experienced editor for EaseUS focused on tech blog writing. Familiar with all kinds of video editing and screen recording software on the market, she specializes in composing posts about recording and editing videos. All the topics she chooses …Read full bio
-
![]()
Melissa Lee
Melissa is a sophisticated editor for EaseUS in tech blog writing. She is proficient in writing articles related to screen recording, video editing, and PDF file conversion. Also, she's starting to write blogs about data recovery, disk partitioning, data backup, etc.…Read full bio -
Jean is recognized as one of the most professional writers in EaseUS. She has kept improving her writing skills over the past 10 years and helped millions of her readers solve their tech problems on PC, Mac, and iOS devices.…Read full bio
-
![]()
Jerry
Jerry is a fan of science and technology, aiming to make readers' tech life easy and enjoyable. He loves exploring new technologies and writing technical how-to tips. All the topics he chooses aim to offer users more instructive information.…Read full bio -
Larissa has rich experience in writing technical articles. After joining EaseUS, she frantically learned about data recovery, disk partitioning, data backup, screen recorder, disk clone, and other related knowledge. Now she is able to master the relevant content proficiently and write effective step-by-step guides on various computer issues.…Read full bio
-
![]()
Rel
Rel has always maintained a strong curiosity about the computer field and is committed to the research of the most efficient and practical computer problem solutions.…Read full bio -
![]()
Gemma
Gemma is member of EaseUS team and has been committed to creating valuable content in fields about file recovery, partition management, and data backup etc. for many years. She loves to help users solve various types of computer related issues.…Read full bio
Page Table of Contents
Jane Zhou
Updated on Apr 19, 2024
0 Views |
0 min read
Mac offers a built-in screen recording unity called QuickTime Player, which can assist you in capturing anything on your screen. However, this app has a drawback, that is, lacking of capturing the internal sound. Most of the time, you may need to record screen on Mac with internal audio, like capturing gameplay, recording live streams, video conferences, etc. At that time, a great screen and internal audio recorder is necessary.
Here, we list some screen capture software and walk you through the steps to record Mac screen with system audio. Let's dig into it!
How to Screen Record Mac with Internal Audio using EaseUS RecExperts
EaseUS RecExperts is an excellent screen and audio recording program for both Windows and macOS users, and it makes all the recording activities super easy.
As for recording screen with system sound on Mac, it is just a piece of cake for this screen and audio recorder. Without downloading any other plugins, all you need to do is to select the right recording mode, then click "REC" to start your recording. Once done, it will automatically save the recorded files on your Mac for editing or sharing. If needed, you can even choose the schedule recording option to begin or end the recording at a specific time. Plus, there are many other amazing features as below:
- Lightweight yet multi-functional screen capture software
- Record screen, webcam, and audio at the same time
- Split the recordings automatically according to a specific time or file size
- Offer some necessary editing tools
- Export recorded files in over 10 formats
Download EaseUS Screen Recorder
Download EaseUS Screen Recorder
Trustpilot Rating 4.7
Now follow the tutorial below to start capturing screen and system sound on Mac:
Step 1. Select the Recording Area
Launch this program on your Mac, then click "Full screen" or "Region" to select the recording area on your desktop.

Step 2. Choose Audio Source/Webcam
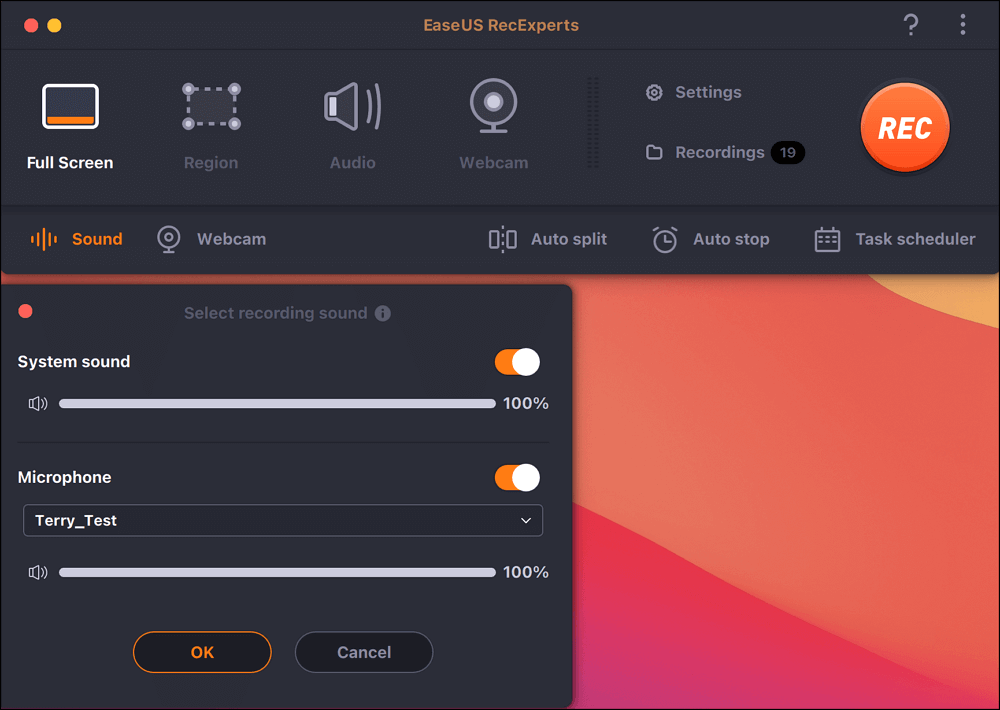
Click the "Sound" icon at the bottom left of the panel to select the sound you want to capture with screen. If needed, you can add webcam overlay to your recording by hitting the "Webcam" icon next to "Sound".
Step 3. Adjust Output Settings
According to your needs, click the "Settings" button on the panel to choose the output format, quality, location, shortcuts, etc.

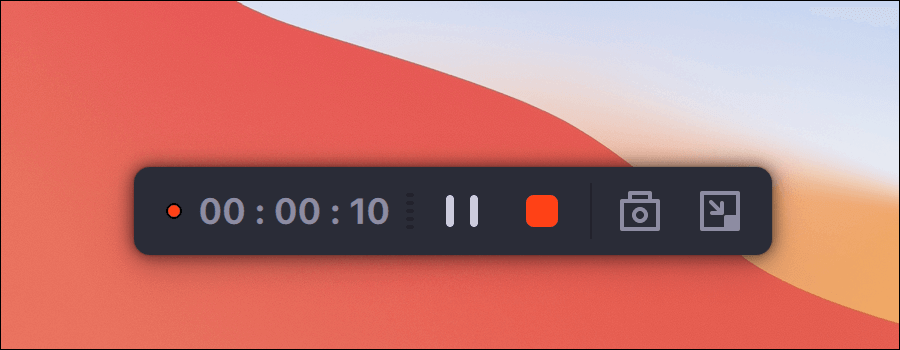
Step 4. Start Recording
Once all settings are done, move back to the main interface and click "REC" to start your recording. Then there will be a toolbar that lets you pause, resume, stop the recording flexibly.
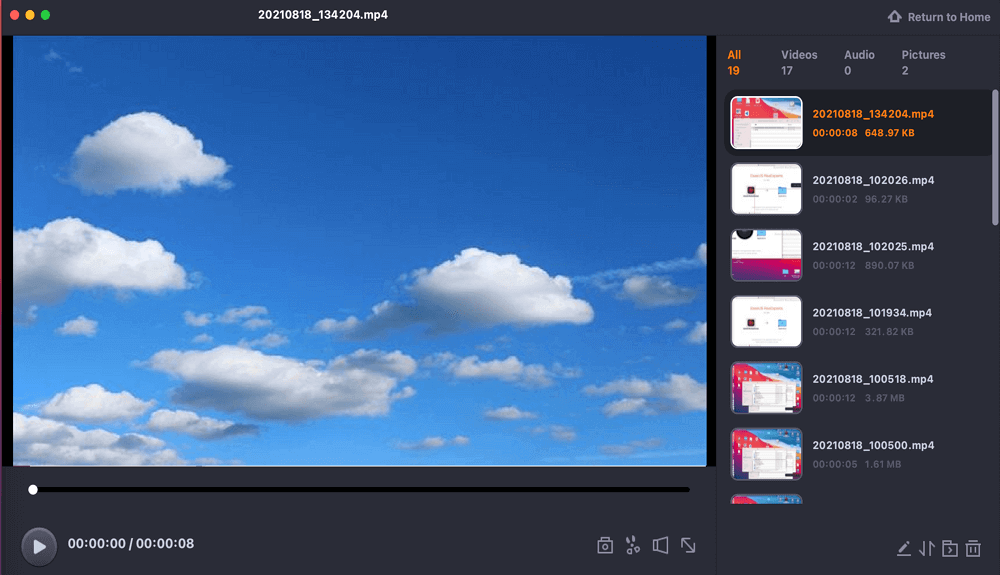
Step 5. View Recordings
When you finish the recording, you can view all the recorded files with the help of the inbuilt player.
How to Record Screen with Internal Audio in macOS with QuickTime
For macOS, there is an inbuilt screen recording program called QuickTime Player. This freeware enables you to record the content from the screen and audio without installing other third-party software. However, it does not have the ability to record internal audio on Mac during the screen recording, as the default option is to either record with no audio or capture audio from an external mic.
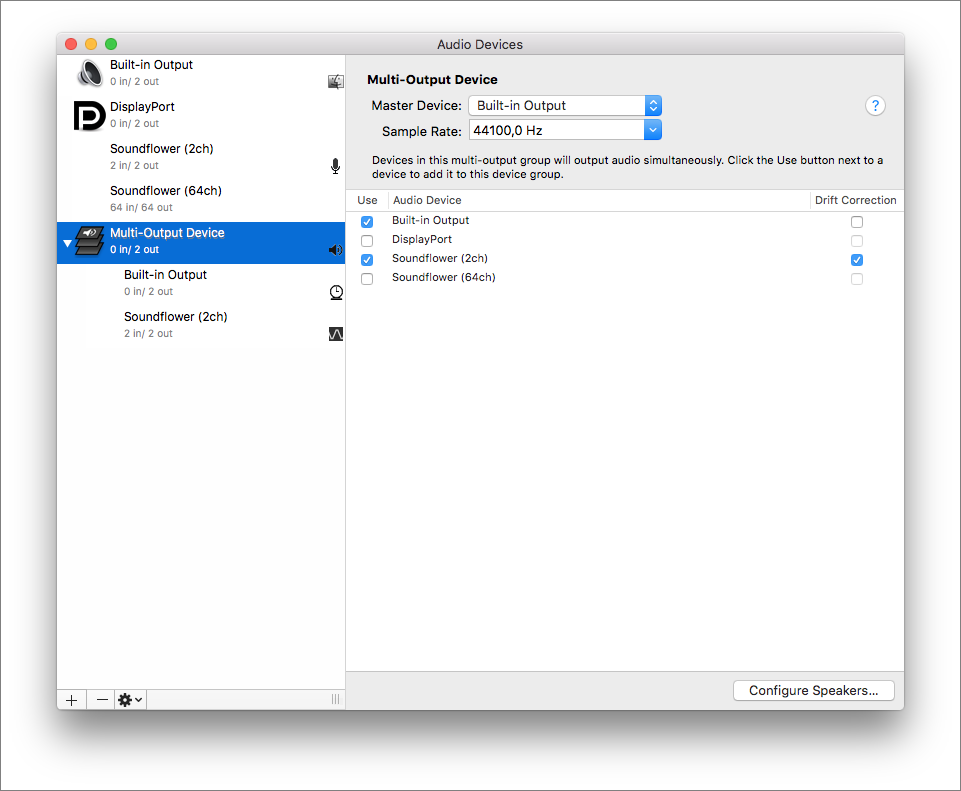
If you insist on using QuickTime to capture screen and system sound on Mac, there is a solution: downloading and adding a plugin - Soundflower. Then you need to change some modifications in sound settings. So now, let's begin:
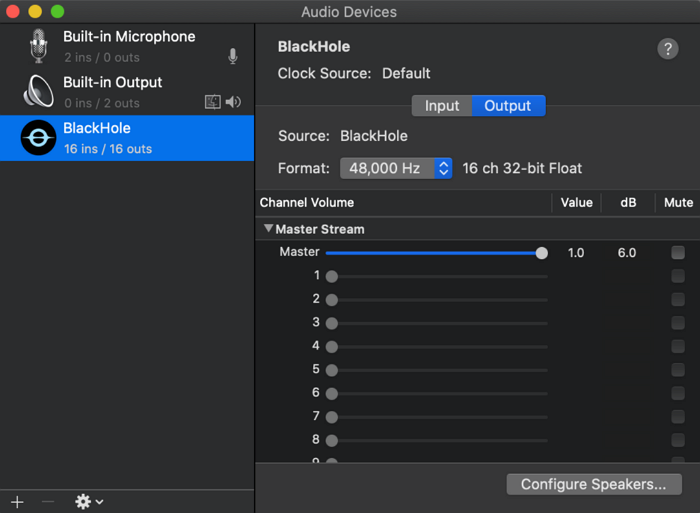
Step 1. Download and install BlackHole on your Mac, then open Audio MIDI Setup.
Step 2. You will see the BlackHole in the left panel. Go down and select the little "+" sign at the left-bottom corner to create an "Aggregate Device" and rename it as "screen recording". Then tick the "BlackHole 16ch" checkbox from the list of audio devices.
Step 3. Click Apple logo > System Preferences > Sound, and click "Output". In the output list, select the "QuickTime Output".
Step 4. Launch QuickTime Player, then click "File" > "New Screen Recording" to start your recording.
How to Record Screen with System Sound on Mac using OBS
Another screen recorder with internal audio you can use is OBS Studio. Similar to QuickTime, this software lets you capture both screen and system audio by installing plugins like BlackHole. But better than the previous tool, OBS offers more functions, like recording, streaming, etc. For its recording functions, this freeware allows capturing multiple screens at the same time, recording webcam, and even capturing screen and webcam with a virtual background.
However, this freeware is not user-friendly because of its complicated user interface and multiple functions. But don't worry, we will show you the step-by-step guide about capturing screen on Mac with audio.
Step 1. Install the BlackHole plugin on your computer, and then adjust the audio settings.
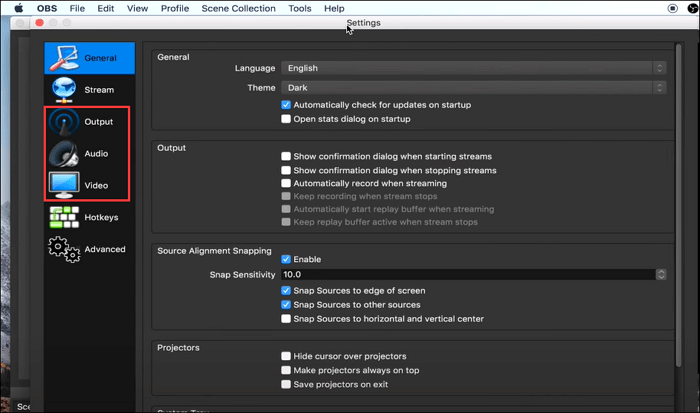
Step 2. Once the setting is done, launch OBS Studio on your Mac. Then click "Settings" to change the audio and video settings according to your needs.
Step 2. Back to the main interface, and hit "+" > "Display Capture" in the Sources box to create a new display.
Step 3. At last, you can click the "Start Recording" option at the lower-right corner to begin your recording task.
How to Record Screen and Sound on Mac using Chrome Extension
The last tool that helps you capture internal audio and screen on Mac is Screen Recorder - a Chrome Extension. If most of your recordings are within the web browser, it is the best solution.
This tool allows you to record Mac screen with system audio without almost any limitation, like time, watermark, etc.
Step 1. Download and add this Chrome extension, then open it.
Step 2. Select what you want to record from three options: only screen, screen, and webcam, or only webcam. Here you can choose the first option.

Step 3. On the following page, select the "System" icon and hit "Start Recording" to begin your Mac screen capture.
Final Words
On this page, you can learn four workable methods to record Mac screen and internal audio. If you prefer freeware, OBS and QuickTime are more suitable for you. But if you are searching for a one-stop solution for screen and audio recording, look no more than EaseUS RecExperts!This program provides all the tools for your recording activities!
Download EaseUS Screen Recorder
Download EaseUS Screen Recorder
Trustpilot Rating 4.7
EaseUS RecExperts

One-click to capture anything on screen!
No Time Limit, No watermark
Start Recording