-
![]()
Daisy
Daisy is the Senior editor of the writing team for EaseUS. She has been working in EaseUS for over ten years, starting from a technical writer to a team leader of the content group. As a professional author for over 10 years, she writes a lot to help people overcome their tech troubles.…Read full bio -
Jane is an experienced editor for EaseUS focused on tech blog writing. Familiar with all kinds of video editing and screen recording software on the market, she specializes in composing posts about recording and editing videos. All the topics she chooses …Read full bio
-
![]()
Melissa Lee
Melissa is a sophisticated editor for EaseUS in tech blog writing. She is proficient in writing articles related to screen recording, video editing, and PDF file conversion. Also, she's starting to write blogs about data recovery, disk partitioning, data backup, etc.…Read full bio -
Jean is recognized as one of the most professional writers in EaseUS. She has kept improving her writing skills over the past 10 years and helped millions of her readers solve their tech problems on PC, Mac, and iOS devices.…Read full bio
-
![]()
Jerry
Jerry is a fan of science and technology, aiming to make readers' tech life easy and enjoyable. He loves exploring new technologies and writing technical how-to tips. All the topics he chooses aim to offer users more instructive information.…Read full bio -
Larissa has rich experience in writing technical articles. After joining EaseUS, she frantically learned about data recovery, disk partitioning, data backup, screen recorder, disk clone, and other related knowledge. Now she is able to master the relevant content proficiently and write effective step-by-step guides on various computer issues.…Read full bio
-
![]()
Rel
Rel has always maintained a strong curiosity about the computer field and is committed to the research of the most efficient and practical computer problem solutions.…Read full bio -
![]()
Gemma
Gemma is member of EaseUS team and has been committed to creating valuable content in fields about file recovery, partition management, and data backup etc. for many years. She loves to help users solve various types of computer related issues.…Read full bio
Page Table of Contents
Jane Zhou
Updated on Dec 01, 2023
0 Views |
0 min read
Nowadays, screen recording has become more and more useful and popular. It can make it easy to deliver instruction, record a video call, share lectures, and many more. So you may wonder how to download a great screen and audio recorder, and how to screen record with sound for free. If you are searching for the solutions, you can find them in this post.
To satisfy your needs, we will show you the top 6 screen recording with sound software, and give you step-by-step tutorials on how to record screen with voice on different platforms, respectively.
- How to Screen Record with Audio on Windows 10
- How to Record Screen with Sound on Mac
- How to Screen Record with Sound on iPhone for Free
- How to Record Screen with Voice on Android
How to Screen Record with Sound on Windows 10
We will introduce two of the free screen recording with voice software for Windows 10 in this part. Whether you need a built-in tool or a third-party tool, you can find the one you need in this part.
1. EaseUS RecExperts for Windows
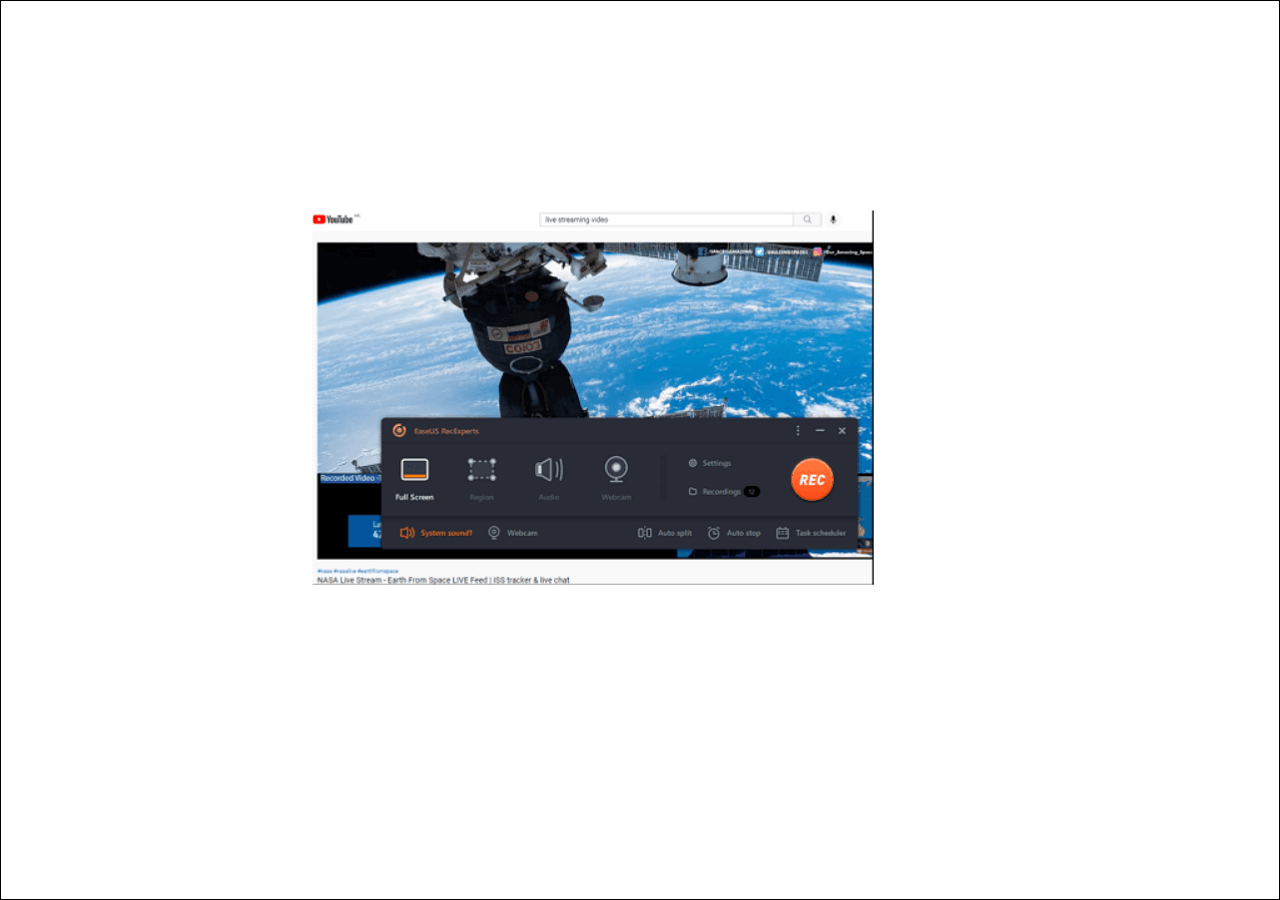
When it comes to the screen recording with sound on Windows, EaseUS RecExperts is worth noting. This program is an all-in-one but easy-to-use screen recorder that enables you to select the recording region freely. You can capture part of the screen or record the full screen on Windows 10 with it. And if you only want to capture the audio, this streaming audio recorder allows you to record both system sound and your voice with a few clicks.
This software is useful on many occasions. You can use it in your work, such as record Webex meetings, or use it for some recreational purposes as it can also work as the best game recording software.
Main Features:
- Support capturing videos in 1080P and 4K
- Record green screen webcam
- Set tasks to schedule recording
- Edit recordings with the built-in tool
If you want to get a versatile and user-friendly screen and audio capture software on Windows, this is what you can't miss. Click on the button below for the free download, and then you can follow this tutorial to record videos and audio easily.
How to Record Your Screen with Sound on Windows 10:Step 1. Run EaseUS RecExperts on your device and you will see two recording modes. You can choose "Full Screen"to record the whole screen or choose "Region" to select the recording area manually before recording.

Step 2. After that, you can choose to record the webcam, system sound, microphone or record none of them as you like. You can also set auto split, auto recording with various functions on the interface.

Step 3. Then, you can click the red "REC" button to start recording. Here will be a menu bar on your screen. To pause the recording, click on the white double vertical bar; to end the recording, click on the red square sign.
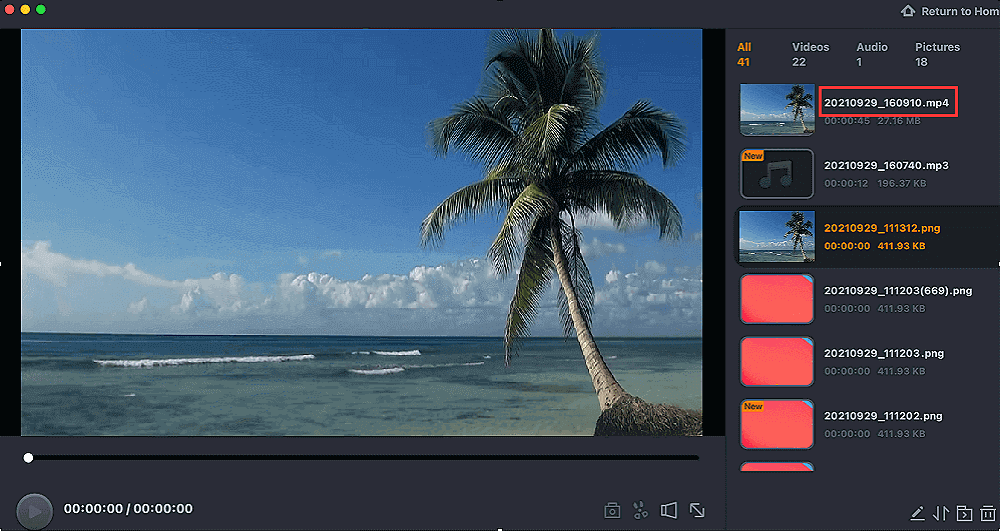
Step 4. After recording, you will be led to the list interface. Here you can view or edit your recordings. To start a new recording, just click on the "REC" button on the top of the interface.

2. Windows 10 Game Bar
If you would rather not download any additional software to record the screen on Windows 10, you can use the Windows built-in tool - Game Bar.
It can be used by anyone offering a swift and convenient way to record your screen and even add audio if needed. To use this feature, first, make sure that Game Bar is enabled.
Screen Record with Voice on Windows 10 with Game Bar:
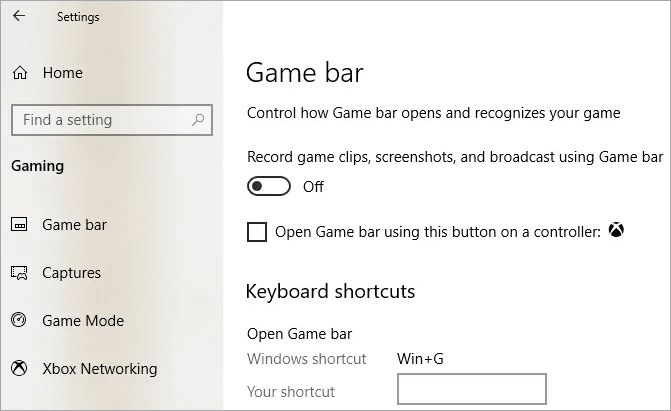
Step 1. Go to "Settings" > "Gaming" > "Game bar". Turn on the switch to "Record game clips, screenshots, and broadcast using Game Bar" if it's not already on. You can also change any of the keyboard shortcuts of opening the Game Bar, taking a screenshot, and recording video on this screen.
Step 2. Press the Windows + G keys to open Windows 10 Game Bar. You may or may not see a prompt asking if the highlighted application on your screen is a game. If required, click "Yes" to move on.
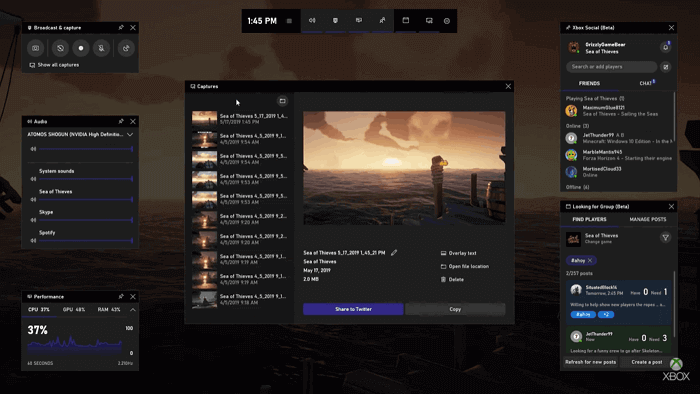
Step 3. The Game Bar provides buttons to access multiple overlays, including sound, performance, and capture. Press the Start/Stop Recording button (alternatively, you can press Windows Key + Alt + R) to start and stop a recording. Use the Turn Microphone On/Off button to toggle the microphone as you need.
Step 4. Once the recording finishes, the file will be saved as an MP4 in your Videos\Captures folder. You can trim your video or rename it in the Xbox app.
How to Screen Record with Sound on Mac
Wondering how to capture screen and sound on Mac? Try the following solutions to easily record video of anything on the screen of your Mac - here's how.
1. EaseUS RecExperts for Mac
Apart from a Windows version, EaseUS RecExperts also offers a macOS version for Mac users. You can use this Mac screen recorder to record live streaming video, audio, or online meetings flexibly.
What's more, it allows you to record internal audio on Mac without downloading other software, and you also can select the audio resources, like Microphone or other external audio devices.
Since it supports many frequently-used file formats, like MP4, MOV, FLV, you can export the recordings in a suitable format and share what you recorded with your friends easily.
Key Features:
- Simple and neat user interface
- Record part of screen, full screen, or a specific window
- Record screen with audio on Mac simultaneously
- Record Mac screen automatically using Task Scheduler
This is a really lightweight but rich-featured screen recorder on Mac, don't miss it. Click on the button below for the EaseUS RecExperts free download.
How to Record Screen and Audio at the Same Time on Mac:
Here is a tutorial about how to record screen on Mac with audio, and you can follow it to record what you need.
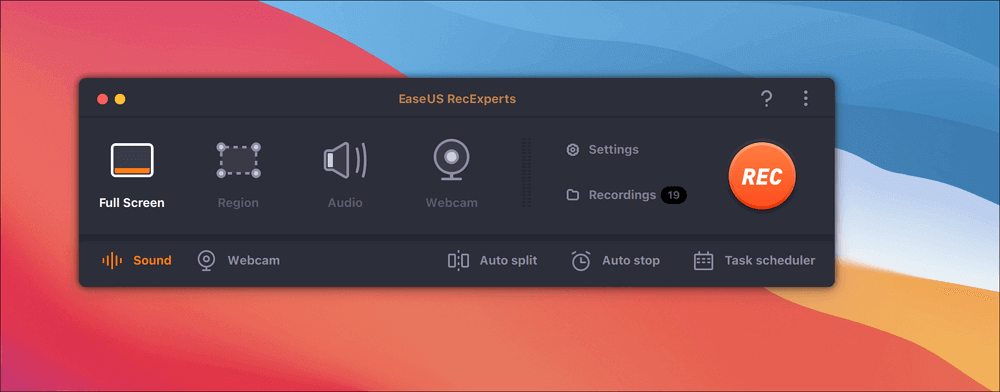
Step 1. Download and launch EaseUS RecExperts on your Mac. To capture the whole screen, click on the "Full Screen" button from the main interface. If you want to customize the recording area, choose the "Region" button.
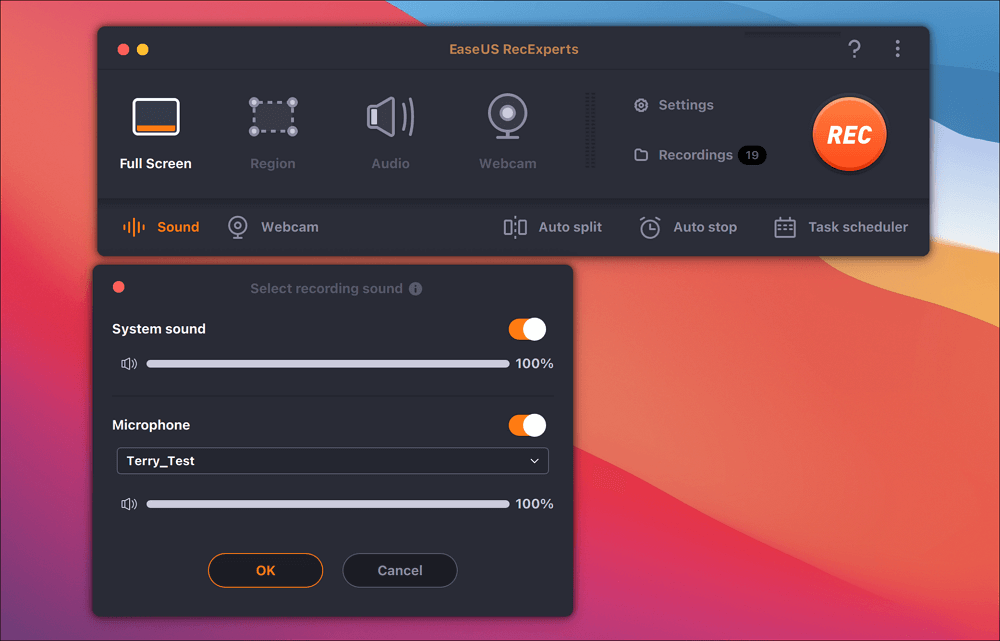
Step 2. To record the screen with audio, hit the Sound icon from the bottom left side of the toolbar. The audio resources can be your external sound or system audio. Based on your needs, enable the target option.
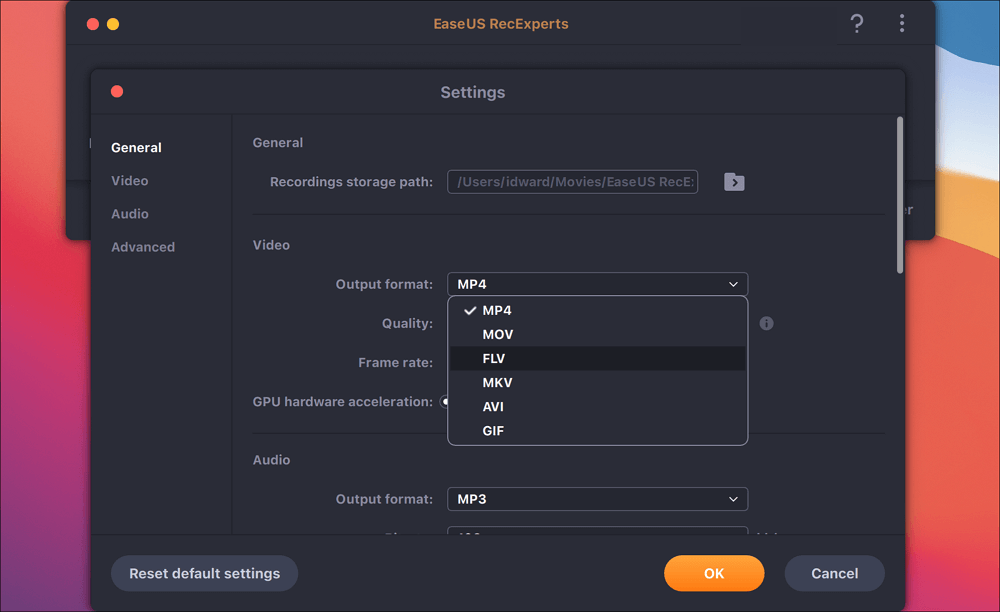
Step 3. Before capturing, you can change the output format of the recorded video by clicking "Settings" from the main interface. Then, scroll down the menu of Output format for Video. Choose the output type as you like.
Step 4. Once done, click the REC button to begin recording. It captures anything displayed on your Mac screen. When you are done, click the Stop button. Then you can watch the recorded video from "Recordings".
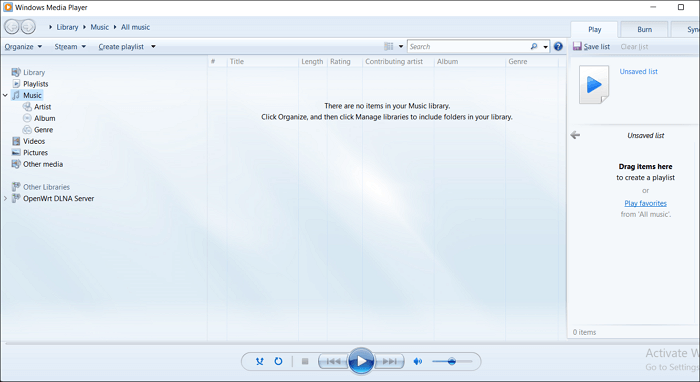
2. QuickTime Player
If your computer hasn't upgraded to macOS Mojave, you can use QuickTime Player to help you record screen along with sound on Mac. But what is the best method for QuickTime screen recording? We will offer you a tutorial about that.
QuickTime Record Screen and Audio Simultaneously:
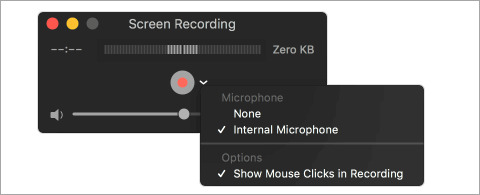
Step 1. Open QuickTime Player from your Applications folder, then choose "File" > "New Screen Recording" from the menu bar to open the Screen Recording window. To record videos with voice or other audio, choose a microphone. You can adjust the volume of audio during recording as you need.
Step 2. Click the "Record" button to start recording. You can click anywhere on the screen to begin recording the entire screen. Or drag to select an area to record, then click "Start Recording" within that area.
Step 3. Click the "Stop" button in the menu bar, or press Command + Control + Esc (Escape) to stop and save the recording. When the recording completes, QuickTime Player will automatically open the recording. You can now play, edit, or share the recording.
Note: On macOS Catalina, when you click "File" > "New Screen Recording", you will see the same onscreen options that you get by pressing Command (⌘) + Shift + 5. Refer to previous steps of the recording screen in macOS Mojave for more details.
How to Screen Record with Sound on iPhone for Free
If you are an iOS user and want to record screen and sound on your devices, you don't need to download or install any applications, as there is a built-in screen recorder on your iOS devices. To screen record with it, you need first to add the Screen Recording feature to the Control Center:
How to turn on Screen Record on iPhone:
Step 1. Go to "Settings" > "Control Center" > "Customize Controls", then tap the plus icon next to "Screen Recording".
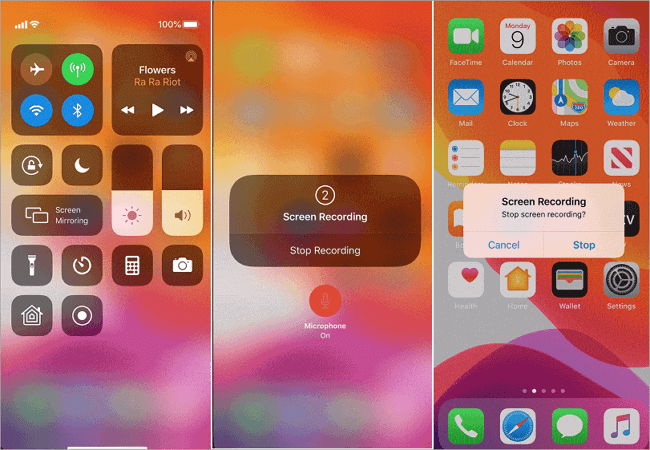
Step2. Open the Control Center. For iPhone X or later or iPad with iOS 12 or later, swipe down from the screen's upper-right corner. If you use an older device, swipe up from the bottom edge of any screen.
Step 3. Tap the Record button, and wait for the three-second countdown. If you want to record screen with sound, press deeply on the gray record icon and tap Microphone to turn it on.
Step 4. You'll know that your screen is recording when you see a red bar on the top. You can tap the red status bar at the top of your screen to stop recording. The screen recording videos will be saved to Photos automatically.
How to Record Screen with Voice on Android
If your Android device is running Android 4.4 KitKat or any later version, you can use ADB (Android Debug Bridge) tool to record screen and microphone on Android without an app. The ADB is a tool used by developers and the Android SDK to communicate with a device at the command line level. You can read the tutorial and see how to record your screen on Android.
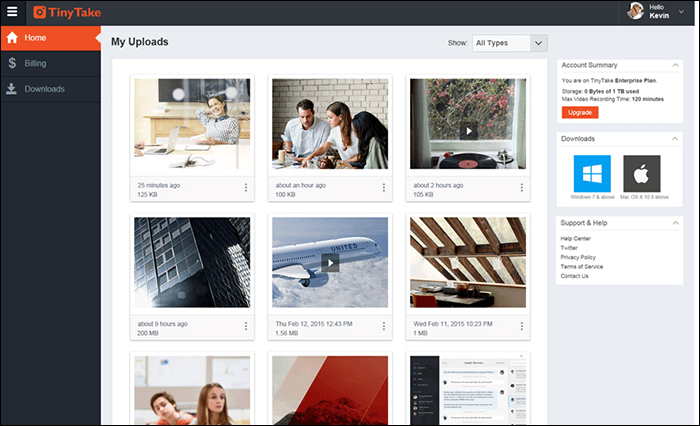
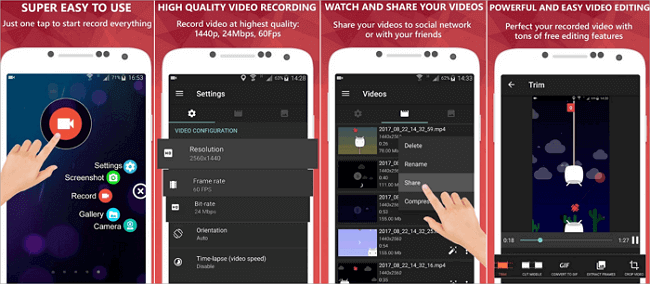
For ordinary users, this method obviously won't work. It's too complicated, and you don't have developer rights. Then, you can rely on AZ Recorder to help out. It is a stable, high-quality screen recording app with no time limits or watermarks. Besides, this screen recording tool provides an easy way to record screen and voice, with no technical requirements.
How to Screen and Audio Record on Android:
Step 1. Download the application in Google Play, and select the "Record" option to record your screen.
Step 2. Tap the "Stop" button by swiping down on your screen to stop the recording. There are some editing features to trim, cut, and edit the video, crop the screen as necessary, replace the audio with whatever you want, and convert sections to GIFs as needed.
To Sum UP
On this page, we display six methods in all to help you record screen with sound on Windows 10, Mac, iPhone, and Android devices. These tools are simple to use to record the screen for free.
Among them, EaseUS RecExperts is the most user-friendly one. If you are interested in this software, we suggest you download it from the button below.
EaseUS RecExperts

One-click to capture anything on screen!
No Time Limit, No watermark
Start Recording