-
![]()
Daisy
Daisy is the Senior editor of the writing team for EaseUS. She has been working in EaseUS for over ten years, starting from a technical writer to a team leader of the content group. As a professional author for over 10 years, she writes a lot to help people overcome their tech troubles.…Read full bio -
Jane is an experienced editor for EaseUS focused on tech blog writing. Familiar with all kinds of video editing and screen recording software on the market, she specializes in composing posts about recording and editing videos. All the topics she chooses …Read full bio
-
![]()
Melissa Lee
Melissa is a sophisticated editor for EaseUS in tech blog writing. She is proficient in writing articles related to screen recording, video editing, and PDF file conversion. Also, she's starting to write blogs about data recovery, disk partitioning, data backup, etc.…Read full bio -
Jean is recognized as one of the most professional writers in EaseUS. She has kept improving her writing skills over the past 10 years and helped millions of her readers solve their tech problems on PC, Mac, and iOS devices.…Read full bio
-
![]()
Jerry
Jerry is a fan of science and technology, aiming to make readers' tech life easy and enjoyable. He loves exploring new technologies and writing technical how-to tips. All the topics he chooses aim to offer users more instructive information.…Read full bio -
Larissa has rich experience in writing technical articles. After joining EaseUS, she frantically learned about data recovery, disk partitioning, data backup, screen recorder, disk clone, and other related knowledge. Now she is able to master the relevant content proficiently and write effective step-by-step guides on various computer issues.…Read full bio
-
![]()
Rel
Rel has always maintained a strong curiosity about the computer field and is committed to the research of the most efficient and practical computer problem solutions.…Read full bio -
![]()
Gemma
Gemma is member of EaseUS team and has been committed to creating valuable content in fields about file recovery, partition management, and data backup etc. for many years. She loves to help users solve various types of computer related issues.…Read full bio
Page Table of Contents
Rel
Updated on Apr 19, 2024
0 Views |
0 min read
As time and technology change, most of you are willing to learn from online lecture videos, as you can get various information from all kinds of lectures without leaving home. Sometimes, you may find that a particular lecture is important and watch it again while offline, but how?
The easiest way is to record lectures with screen recorders. We will show you how to record lectures on Windows/Mac/iPhone with the 5 best screen recorders on this page. Now, continue reading to find the best way to record lectures on your device.
PAGE CONTENT:
Related Article: Top 12 Best Free Screen Recorder for Windows & Mac
How to Record a Lecture on Windows/Mac
If you are a teacher, you may want to record yourself and your screen as a teaching video. If you are a student, you may also need to capture the PPT on the screen and yourself from the face cam together. In these cases, EaseUS RecExperts is your best choice. Download it now!
This screen recorder records the screen and the webcam together or separately with easy operations. It offers virtual backgrounds for your recordings. Classroom, studio, scenery, blur... You can get anything you want. You can also change your background with the green screen feature. Of course, you need to prepare a solid green background first.
Besides, it offers you many other options, like recording system sound, microphone, or both. It even records streaming video if the lecture is on streaming. After recording, you can let the AI assistant generate a text file of what you said for later use.
Steps to Record a Lecture on Windows:
Step 1. Go to the video meeting that you want to record and launch EaseUS RecExperts on your devices. Choose the "Full Screen" recording mode to record the whole screen or the "Region" mode to record your customized area.

Step 2. Then, choose to record the system sound, microphone sound, webcam, or none by clicking on the according buttons. You can even record webcam with AI background. When all is done, click on the red "REC" button to begin.

Step 3. The recording process will start after a three-second countdown. If you want to pause the recording, click on the white double vertical bar ("F10"). To end the recording, click on the red square sign ("F9").
Step 4. It saves your recordings in MP4, GIF, AVI, and more. After recording, you will be led to the recording list interface. Here, you can even use the AI assistant to export meeting discussions to text files.

Also, if you want to know how to record a Zoom meeting without permission, follow the below post!
How to Record Zoom Meeting without Permission
Screen recorders like EaseUS RecExperts can record online meetings like Zoom. Here, this post introduces the efficient method to record it even if you are not the host.

How to Record Online Lectures on Mac
For Mac users, there is still some freeware you can use to capture lectures. Here we will introduce two popular and reliable screen recorders for you.
1. QuickTime Player
QuickTime Player is a multifunctional program that you can use to record class lectures on Mac. This software can not only media files but record audio and screen on your computer. It can capture anything appearing on your screen with ease.
If you need to record an online lecture, you need to install free software called Soundflower on your computer, as Mac does not allow you to capture the internal audio.
How to Record Lectures on Mac with QuickTime Player:
Step 1. Download and install Soundflower on your Mac. Then click "System" > "Sound Preference" and select Soundflower (2ch) as the Input audio from the Input bar.
Step 2. Open the lecture video that you want to record and launch QuickTime Player. Click "File" > "New Screen Recording" on the top bar. Then click the triangle beside the red button, and select Soundflower (2ch) from the drop-down menu.
Step 3. When you are ready, you can click the red button to start recording lectures. When the lecture finishes, click the stop button to end the recording.
Step 4. After that, you will find the recorded lectures on your Mac in the MOV format. And you can watch it anytime and anywhere.
2. EaseUS RecExperts for Mac
EaseUS RecExperts for Mac is an excellent third-party screen and Webcam recorder for you to record classes on Mac. This Mac screen recorder is an excellent choice for those who want more functions besides the QuickTime Player's essential tools.
When you are using QuickTime Player, a plug-in named Soundflower is indispensable to record the sound. But you don't need to install that plug-in if you record audios using EaseUS RecExperts. You can even effortlessly capture the system audios and your voice simultaneously or separately.
Features:
- Record Webcam in 1080P or 720p
- Record voice on Mac without much effort
- Offer you a Task Scheduler to record automatically
- Support trimming videos with a built-in tool
After recording the lectures, you can export the recorded videos in formats like MP4, MOV, FLV, etc. If you need this recorder, click on the button to download it.
Best Way to Record Lectures on Mac:
Step 1. Open EaseUS RecExperts, and choose the "Webcam" button on the main interface.

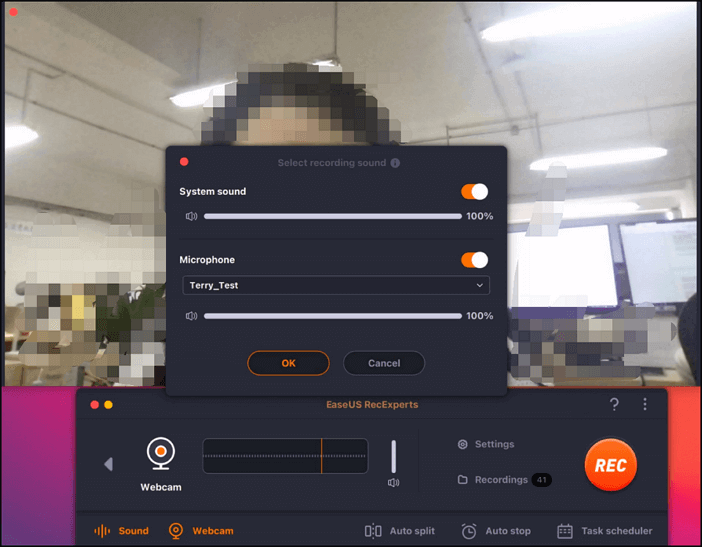
Step 2. Then the inbuilt camera will open automatically, and you can see the recording window on the desktop. If you want to record the webcam with audio, click on the "Sound" icon at the bottom left to select the audio source.
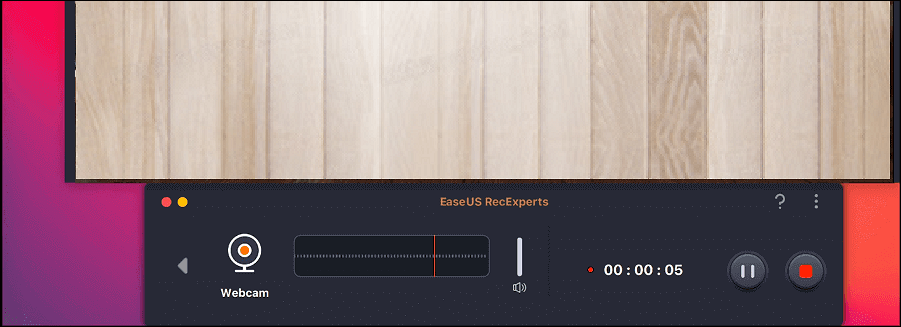
Step 3. Click "REC" to start your webcam recording, and you can choose to pause, resume, or end the recording by clicking the two buttons on the left side. At last, the recording will be saved on your Mac.
3. OBS Studio
OBS Studio is an open-source screen recorder that is used widely all over the world. It is mainly used for video recording and live streaming. Apart from that, with rich features, it is also an excellent lecture recorder.
You can use it to record any lecture video online to watch it while offline. However, it is a little difficult for beginners to use without guides.
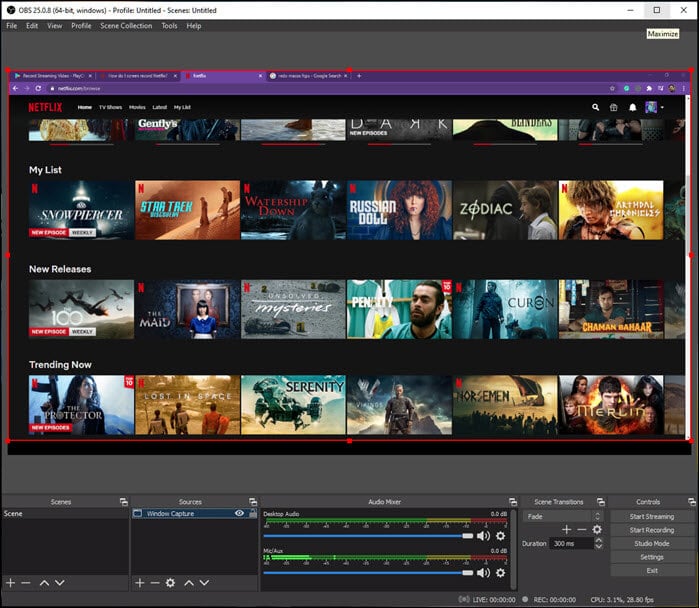
How to Record Lectures on Mac with OBS Studio:
Step 1. Download and install iShowU Audio Capture on your Mac. Then go to "Audio MIDI Setup" and choose the "iShowU Audio Capture" as the main device.
Step 2. Choose the "System Preference" followed by "Sound Preference," and then select "Multi-Output Device." After that, open OBS Studio and set Audio to "iShowU Audio Capture."
Step 3. OBS Studio's main interface, right-click and choose Windows capture to select the lecture window you will record. Then you can click the red button to start capturing lectures.
Step 4. When it finishes, click the stop button to end the recording. You will find the recorded videos on your Mac.
How to Record Lecture on iPhone/iPad
If you want to record online lectures on iPhone or iPad for convenience, you can use the iOS Screen Recorder for recording a lecture. Using it, you can easily and quickly capture what you need on your iOS devices without installing third-party applications.
Know the screen recorder but do not know how to use it? Take a look at the following steps.
Note: You can use the iOS screen recorder only if the iOS system on your devices is 11, 12, or later versions.
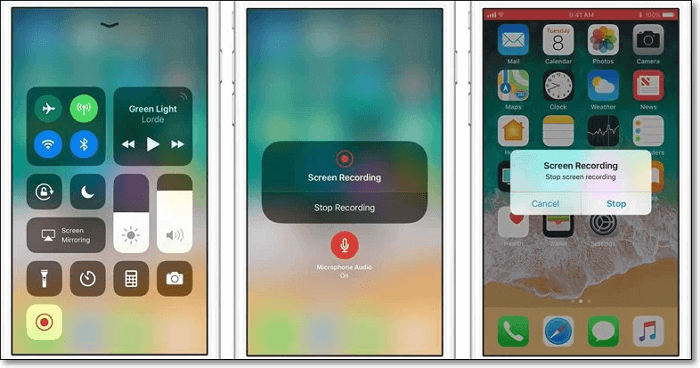
Detailed Tutorial for Recording Lectures:
Step 1. Unlock your iPhone or iPad, then tap "Setting" > "Control Centre" > "Customize Controls" to find "Screen Recording" in the bottom list. Then tap the "+" button.
Step 2. Find the lecture that you want to record and open it. Swipe down from the top-right of the screen, and you will see the Control Centre. Tap the screen recording and press "Start Recording" to start recording lectures.
Step 3. Tap the red bar to stop the recording of lectures. Then you can find the recorded lecture video in your Photos app.
Bonus Tips: How to Record a Lecture for Students Using Webcam
In the first half of this post, we talked about recording online lectures or classes as a student. If you are a teacher, what you most want to know is how to record an online video lecture for your students. Of course, a powerful screen and Webcam recorder can help you do that. Before the recording, you need to do some preparations.
1. Prepare Lecture Contents and Slides
First, you need to plan the contents you want to discuss in the lecture in advance. This plan can be as accurate as possible to know how to allocate the class time.
And the attractive slides can help your student understand some key points and remember the necessary knowledge.
2. Download and Install the Recorder for Lectures
When it comes to the lecture recording software, you should pay attention to the recorder's essential functions. For example, it should allow you to record a webcam in high quality and record both the computer sound and your voice. EaseUS RecExperts can meet all those needs in recording a lecture.
If this is exactly what you want, click the button below to download the recorder now.
3. Optimize Audio and Video Quality
Before recording the lectures, you need to customize some settings of the video and audio. You can choose the most suitable frame rate and bitrate according to your need ( for Windows Version). Make sure that you select the best video quality and volume.
Besides that, make sure that you choose a great light source. A light in front of you could be better than the one behind you. Then, try your best to avoid the background noise, which will distract students' attention.
4. Start Recording
Now, you can begin to capture lectures for your students. If you want to improve the video and audio quality, an external microphone and an external camera will be helpful.
If you are using a MacBook, click the article below to know the detailed steps to record a webcam.
How to Record Webcam on Mac
In this post, you will know everything from creating video tutorials and demos to recording Webcam chats and video calls on your MacBook.
If you want to record an online class for your students on Windows, you can follow the steps in this article: >>How to Record Webcam on Windows PC.
The Bottom Line
Regardless of what devices you use to record lectures, you can find the best lecture recording app for Windows and Mac in this article. Besides that, you can also find the tutorial on how to record lectures with those apps. Which is the best way to record lectures for you?
If you want to do the recording on iPhone or iPad, the built-in screen recorder is your best choice. If you work on a Windows computer or a MacBook, we highly recommend EaseUS RecExperts. This screen recording software can record audio, screen, webcam, etc., with simple clicks. It can meet all your needs and never disappoint you!
EaseUS RecExperts

One-click to capture anything on screen!
No Time Limit, No watermark
Start Recording