-
![]()
Daisy
Daisy is the Senior editor of the writing team for EaseUS. She has been working in EaseUS for over ten years, starting from a technical writer to a team leader of the content group. As a professional author for over 10 years, she writes a lot to help people overcome their tech troubles.…Read full bio -
Jane is an experienced editor for EaseUS focused on tech blog writing. Familiar with all kinds of video editing and screen recording software on the market, she specializes in composing posts about recording and editing videos. All the topics she chooses …Read full bio
-
![]()
Melissa Lee
Melissa is a sophisticated editor for EaseUS in tech blog writing. She is proficient in writing articles related to screen recording, video editing, and PDF file conversion. Also, she's starting to write blogs about data recovery, disk partitioning, data backup, etc.…Read full bio -
Jean is recognized as one of the most professional writers in EaseUS. She has kept improving her writing skills over the past 10 years and helped millions of her readers solve their tech problems on PC, Mac, and iOS devices.…Read full bio
-
![]()
Jerry
Jerry is a fan of science and technology, aiming to make readers' tech life easy and enjoyable. He loves exploring new technologies and writing technical how-to tips. All the topics he chooses aim to offer users more instructive information.…Read full bio -
Larissa has rich experience in writing technical articles. After joining EaseUS, she frantically learned about data recovery, disk partitioning, data backup, screen recorder, disk clone, and other related knowledge. Now she is able to master the relevant content proficiently and write effective step-by-step guides on various computer issues.…Read full bio
-
![]()
Rel
Rel has always maintained a strong curiosity about the computer field and is committed to the research of the most efficient and practical computer problem solutions.…Read full bio -
![]()
Gemma
Gemma is member of EaseUS team and has been committed to creating valuable content in fields about file recovery, partition management, and data backup etc. for many years. She loves to help users solve various types of computer related issues.…Read full bio
Page Table of Contents
Melissa Lee
Updated on Apr 15, 2024
0 Views |
0 min read
There are various occasions when you want to record the internal sound of your computer. You might want to record the audio of a video, to record your online calls, and to record the background music of your games. No matter the reason, there are some good software tools that help you record the internal audio on Windows systems.
The following guide takes a look at one of the popular recording app called Audacity. This app allows you to record audio both from your microphone as well as from your computer system. The guide also helps you discover some of the other recorders that you can use to record audio on Windows 10.
| Workable Solutions | Step-by-step Troubleshooting |
|---|---|
| Fix 1. Audacity | Once you have downloaded and installed Audacity, launch the tool on...Full steps |
| Fix 2. EaseUS RecExperts | Launch this program on your computer, and click "Audio" on the...Full steps |
| Fix 3. OBS | Launch the tool and you will see a section that says "Sources"....Full steps |
| Fix 4. Icecream Screen Recorder | Fire up the software after it is installed and click "Settings"....Full steps |
| Fix 5. VLC | You need to turn on the recording options if you have not already ....Full steps |
How to Record Computer Audio with Audacity on Windows 10
In case you do not already know, Audacity is a free and open-source recording tool that has been available for many years. Using this tool, not only can you record new audio files but you can edit your existing audio files as well. This tool is loaded with tons of features to help you edit and mix all kinds of sound files on your computer.
The great thing about using Audacity for this task is that it has an easy to use the option to fetch sound from your system. You do not need to mess around with any complicated menus, as there is an easy to locate option that you can use to get and record sound from your Windows 10 computer.
How to Use Audacity to Record Internal Audio on Windows 10:
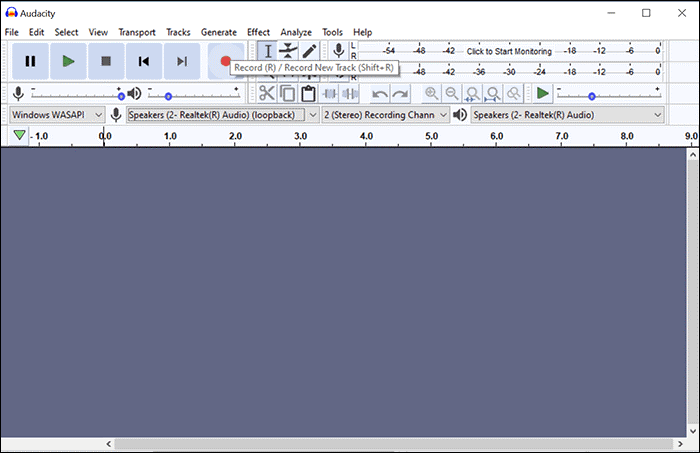
Step 1. Set Up the Recording Options
Once you have downloaded and installed Audacity, launch the tool on your PC. You will find many options on the main interface but you do not need to use them all. Simply click the first dropdown menu and choose "Windows WASAPI" from it.
Then, click the dropdown menu next to the microphone icon and choose your computer's speakers. This will be the source of the audio for your recording.

Step 2. Record Your Computer Audio
Once you have configured the above options, you can begin to record your computer audio. To do that, click the red recording button and the tool will start recording the audio from your system. You will see the live recording progress on your screen.
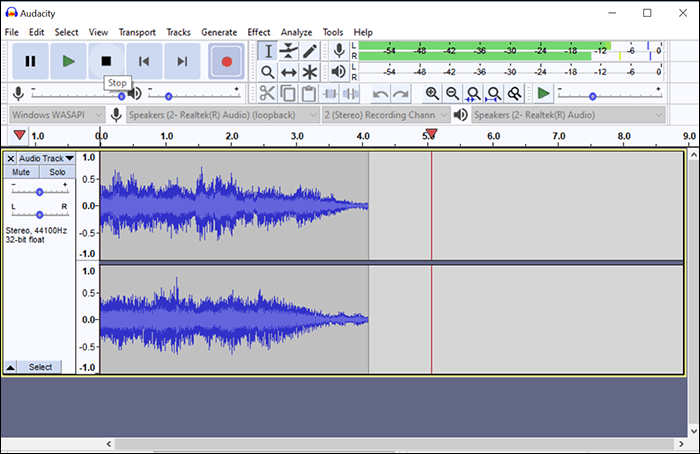
Step 3. Stop Recording Your Computer Audio
You can keep the recording running for as long as you want. When you are done, you can stop the recording by clicking the stop button in the top menu bar of the tool. This will stop your recording but will not save the recorded file, yet.
Step 4. Save Your Recorded Computer Audio
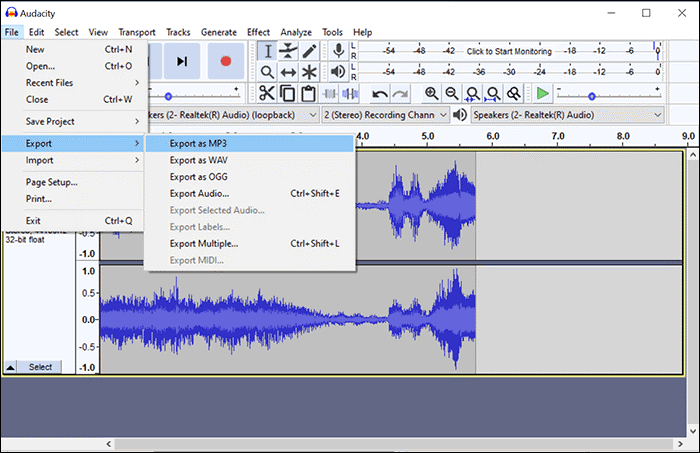
Now that you have finished and stopped your recording, you can save the recorded file in an audio format on your machine. To do this, click the "File" menu at the top and select "Export" followed by "Export as MP3". You are free to choose any other audio format if you would like. Then, choose a folder to save your file and the tool will save it for you.
You are all set. Audacity has successfully recorded and saved your internal sound recording on your Windows 10 system.
Record Computer Audio on Windows 10 with Other Audio Recorders
Audacity is not the only program that you can use to record internal audio on a Windows system. There are many other options available some of which are even better than that tool. The following helps you discover those available programs and shows how you can use them to make system sound recordings on your PC.
1. Use EaseUS RecExperts to Record Computer Sound on Windows 10
Compatibility: Windows 7/8/8.1/10
While Windows 10 has several tools available to help you record computer audio, EaseUS RecExperts, a helpful screen recording software, provides some of the easiest options to do that task. No matter whether you are a beginner or a professional, you find it easy to record various kinds of sounds on your Windows system with this tool. The program has an easy-to-use interface with no complex options or configurations.
To record audio from computer, all that you need to do is click a few options and the tool will get it done for you. You can download this software for free to have a try.
Using EaseUS RecExperts to Record Computer Audio:
Step 1. Launch EaseUS RecExperts on your computer, and click "Audio" (looks like a speaker) on the left side of the main interface.

Step 2. To record the internal audio, you need to select the "System sound" option on the next window. You can adjust the volume by clicking on "System sound" > "Advanced options".

Step 3. Next, click on the red "REC" button to begin your recording. While recording, you can pause or stop the recording by clicking on the according buttons.

Step 4. Once done, you can find the recordings in the pop-up recording list window.

2. Record Computer Audio Using OBS on Windows 10
Compatibility: Windows 8/8.1/10
OBS stands for Open Broadcaster Software, which is a well-known open source screen recorder. This program allows you to make many types of recordings including screen recording and audio recording. One of the many good things about this utility is that you can add an unlimited number of scenes, and you can add various recording sources as well. Since the internal audio comes out of your speakers, you can choose them as the recording source to record the computer audio.

Using OBS to Record the Computer Audio:
Step 1. Add an Audio Source
Launch the tool and you will see a section that says "Sources". In here, click the "+" (plus) sign and choose "Audio Output Capture". Click "OK" on the following screen to finish adding an audio source.
Step 2. Record Your Internal Audio
On the right of your screen, find and click "Start Recording". This will start recording the audio from your chosen audio source, which is your internal audio.
Step 3. Stop Your Computer Audio Recording
When you have finished your recording, click "Stop Recording" on the right side and your recording will be saved on your machine.
Step 4. Access All Your Computer Audio Recordings
You will probably want to access and play your recording once you have finished it. To do this, click the "File" menu at the top of your screen and choose "Show Recording". The folder containing your recordings will open in File Explorer.
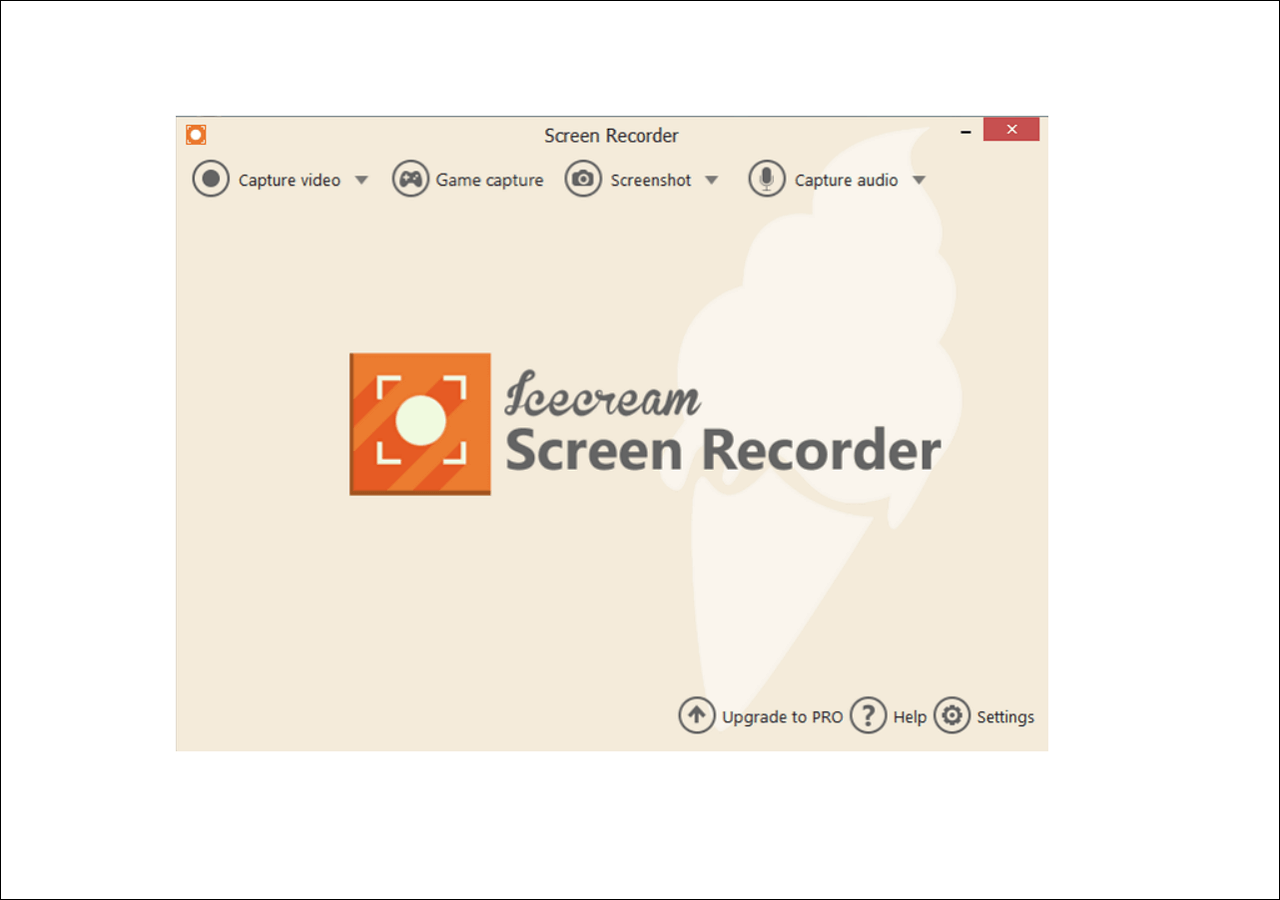
3. Use Icecream Screen Recorder to Record Internal Audio on Windows 10
Compatibility: Windows Vista/7/8/8.1/10
While Icecream Screen Recorder is a screen recording program equipped with many features and one of these features lets you record audio from both your microphone as well as computer sound. You can quickly and easily access this feature and use it to make as many and as long computer audio recordings as you want.
One of the options you will find useful is the ability to choose an audio bitrate for your recording. Many pro recorders out there will find this really useful. There are several other options that you will find in the settings, and you can modify these to ensure your recordings are made your way.
Using Icecream Screen Recorder to Record Computer Audio
Step 1. Choose What to Record
Fire-up the software after it is installed and click "Settings" at the bottom. Head to "Audio" and tick "Record audio". Click "Save Settings" at the bottom.
Step 2. Select a Bitrate for Your Recording
Head back to the main user interface, find the option that says "Capture audio", and choose one of the three options displayed on your screen. This sets the bitrate for the recording that you are going to make. Higher bitrates are good but they take up more of your storage.
Step 3. Record Your Computer Audio
A new panel will open that lets you start and stop your audio recording. On this panel, click the "Rec" button to begin your computer audio recording. Then, you can click the stop option to stop your recording when you are done.
Step 4. Find Your Recorded Computer Sound
The tool saves your recordings in a pre-specified folder. You can find the path to this folder by going into "Settings" and clicking the "Save to" tab.
4. Record Your Computer Sound Using VLC on Windows 10
Compatibility: Windows XP/Vista/7/8/8.1/10
VLC has long been used as a media player app and now you can use it to record your computer audio as well. With this tool, you can actually make various recordings including computer screen and computer audio recordings. The app offers various options for you to make your computer audio recording. You have various file formats to choose from, and there are many other configurable options that you can use. This tool is available at no cost and is open-source, which means you can use it to make recordings at both your work as well as at your home without any restrictions.

Using VLC to Record Computer Sound:
Step 1. Enable the Recording Options
You need to turn on the recording options if you have not already in VLC. To do this, click the "View" menu at the top and select "Advanced Controls". This will add the recording options to the bottom bar in the app.
Step 2. Configure the Recording Source
To set up an audio source for your recording, click the "Media" menu at the top and select "Open Capture Device". Click the "Capture Device" tab, select your speakers from the "Audio device name" field, and hit "Play" at the bottom.
Step 3. Start and Stop Recording Computer Sound
You can begin your computer audio recording by clicking the recording button in the bottom bar of the program. When you are done, simply click the stop button and that will stop your recording.
Conclusion
If you prefer Audacity, the above should teach you how to record your computer's internal audio with this program. If you want a bit more flexibility and a modern interface, EaseUS RecExperts is the tool to go for. The other tools do a pretty good job of recording as well.
EaseUS RecExperts

One-click to capture anything on screen!
No Time Limit, No watermark
Start Recording