If you want to set a file as your iPhone ringtone, you must convert this file to the M4R format, the standard format for iPhone ringtones, to set it as a ringtone on your iPhone. Here in the article, I would like to show you two solutions for how to convert WAV to M4R in detail.
What Are a WAV File and an M4R File?
WAV (Waveform Audio File Format ) is a sort of audio file format developed by IBM and Microsoft, featured with lossless and uncompressed sound quality. The sound quality of a WAV audio file is much better than that of an MP3.
M4R is an audio format developed by Apple, working exclusively as iPhone ringtones. It is a renamed version of the M4A file format in nature.
How to Convert WAV to M4R, an iPhone Ringtone?
To convert a WAV audio file to a standard iPhone ringtone, you need a WAV to M4R converter. I have got you two tools for this purpose. One is EaseUS Ringtone Editor, a third-party iPhone ringtone maker, and the other is iTunes, the official solution provided by Apple. Though EaseUS Ringtone Editor is a third-party tool, but it is really safe and easy to use. I will show you how to make a ringtone for iPhone from a WAV file with these two tools respectively.
Method 1. How to Convert WAV to M4R with EaseUS Ringtone Editor?
EaseUS Ringtone Editor is an iPhone ringtone maker developed by a team that aims to optimize iOS users' experience with iPhone/iPad. Apple provides an excellent performance experience to iOS users. But we have to admit that sometimes it is tough to utilize your iPhone/iPad. EaseUS Ringtone Editor is created to relieve iPhone users from the complicated process of setting a song as iPhone ringtone. Let's start with the simple tutorial to convert WAV to M4R.
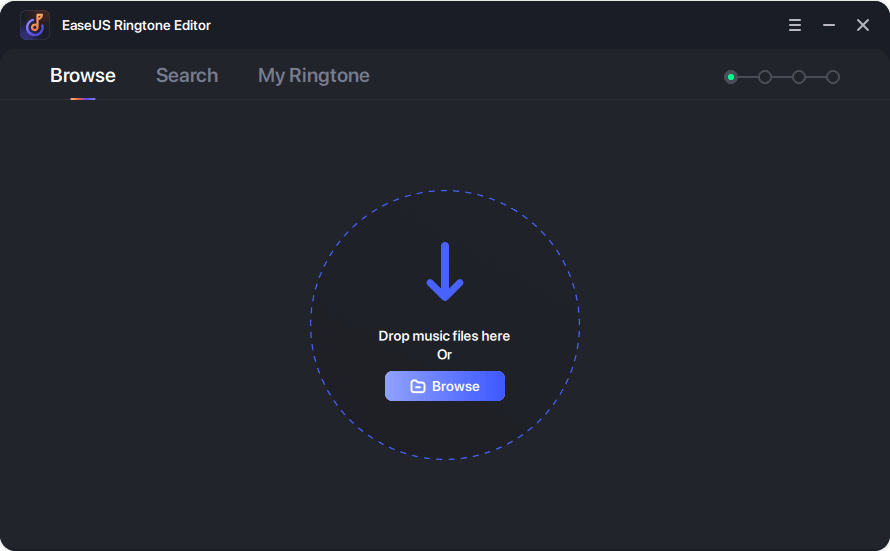
Step 1. Connect your iPhone to the computer > Run EaseUS Ringtone Editor > Drag and drop the music file to the editing bar, or you can select a song from your computer by clicking "Browse."
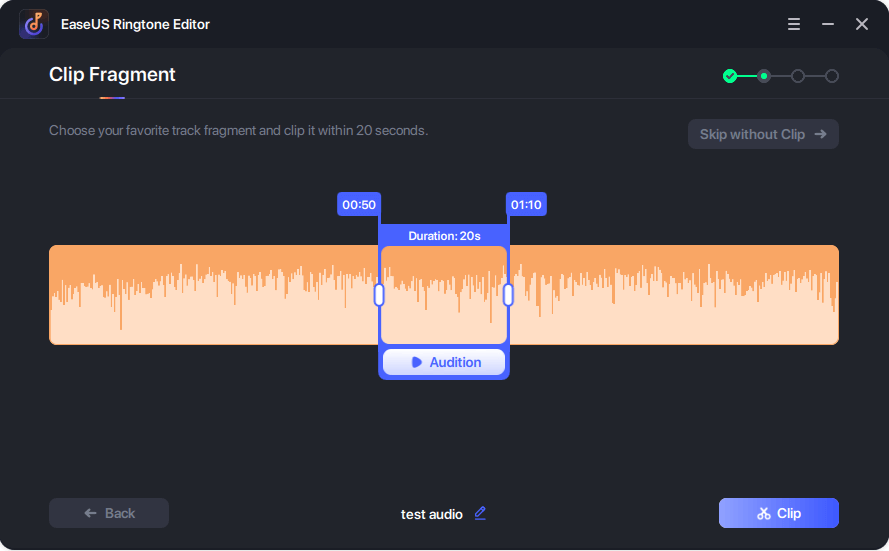
Step 2. Rearrange and shorten the length of the song by dragging the slider to the start and stop time of the song you wish to use as a ringtone > Click "Clip" to proceed.
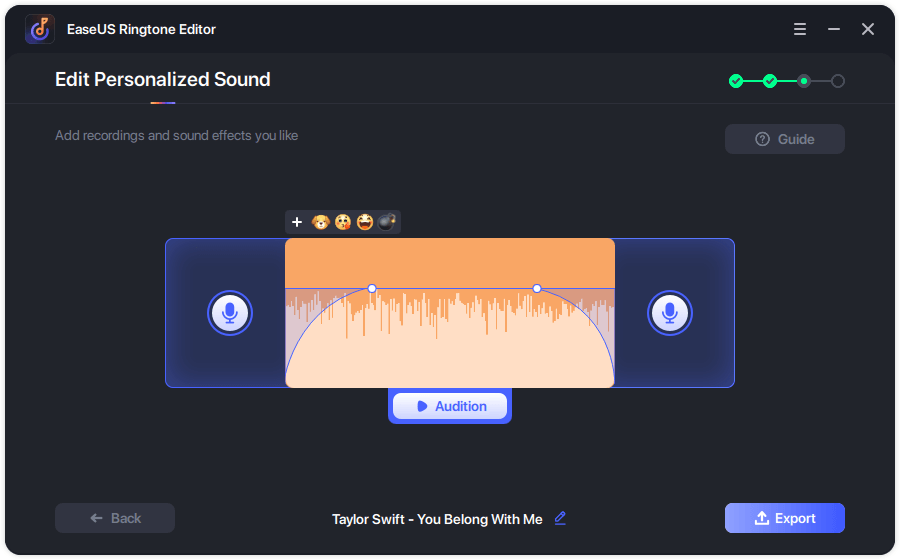
Step 3. After clipping, you can add recordings and sound effects like fade-in/fade-out and emojis sound to the clip. Once it's done, click "Export."
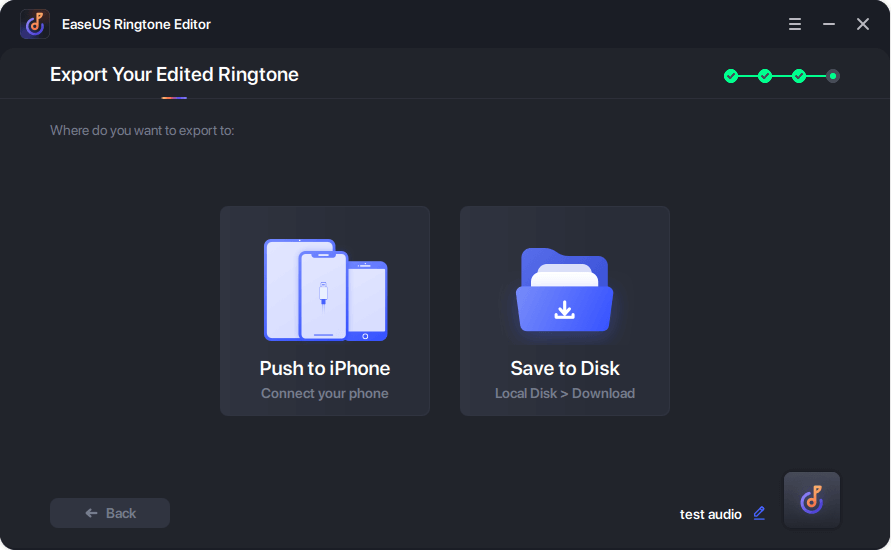
Step 4. You can choose "Push to iPhone" to export your edited ringtone to your device or choose "Save to Disk" to save it on your computer.
With the 4 simple steps above, you are able to convert a WAV file to M4R format and push it to your iPhone. You just need to go to your iPhone "Settings" > "Sounds & Haptics" to set this converted audio as your ringtone. You can also directly save the converted M4R file to your PC if you just prefer to keep the audio in an M4R format.
Here is a full guide about how to change ringtones on iPhone, check it if you don't know how to change ringtones on iPhone. If you use an Android phone, you can convert WAV to MP3 on Windows 10 to make it a ringtone as well. This tool we recommend can convert audio to MP3 from any format.
Method 2. How to Convert WAV to iPhone Ringtone with iTunes
The second way to make an iPhone ringtone from a WAV file is to use iTunes.Though it is quite hard to use (I believe I am not alone regarding this point), it does most work for Apple users when it comes to handling iOS data and files. Let's see how to use this iTunes to convert the audio format from WAV to M4R.
Step 1. Install iTunes on your PC and then launch it.
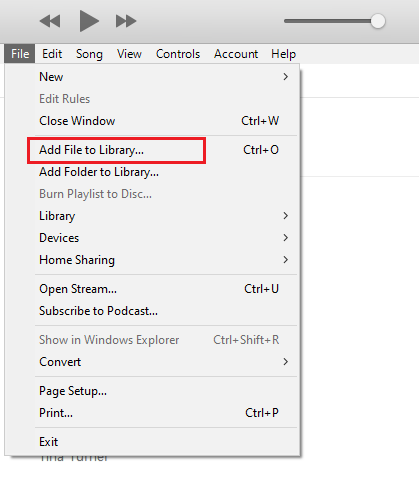
Step 2. Click "File" > "Add File to Library..." to add a WAV file on your PC to iTunes (Skip this step if your audio file is already in iTunes Library).
![Add an WAV file to iTunes]()
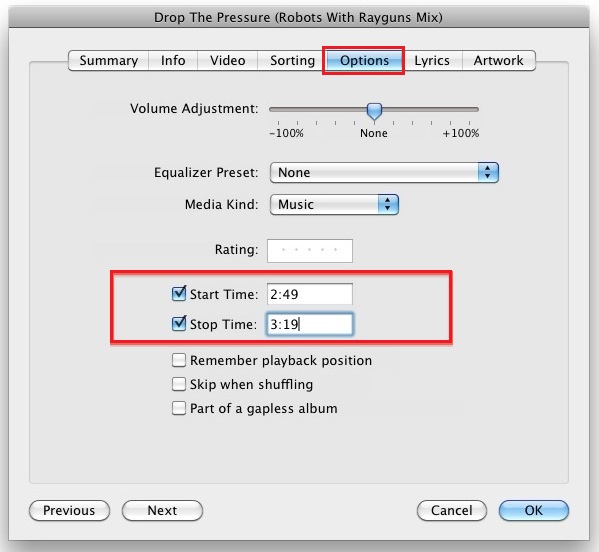
Step 3. Right-click on the song name and choose "Song info" to cut the WAV file within 40 seconds. Click "Options" and then enter the time in the box next to "start" and "Stop." Click "OK" to complete the audio cut.
![Trim the audio]()
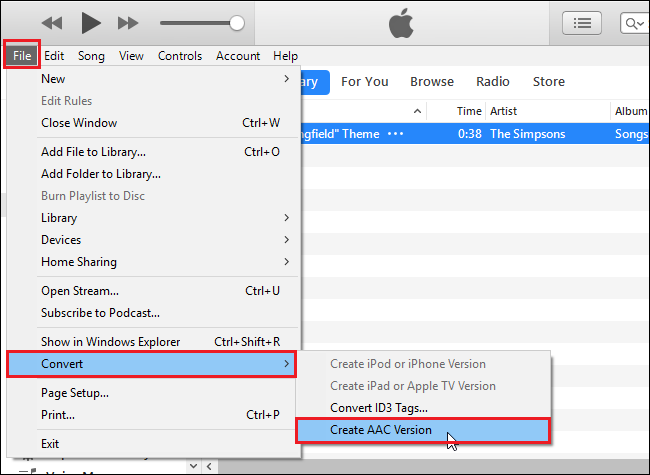
Step 4. Load the trimmed song in Library by clicking " File" > "Convert" > "Create ACC Version."![Convert the audio file to M4A]()
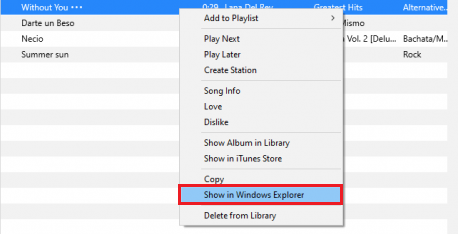
Step 5. Right-click on the loaded song in the library and choose "Show in Windows Explorer." You will find the file is converted to M4A format.
![Show the file in Windows Explorer]()
Note: If the file extension is not showing up, enable the option "File name extensions" under the "View" tab of the window.
Step 6. Change the file format to M4R by modifying the file extension from ".m4a" to ".m4r".
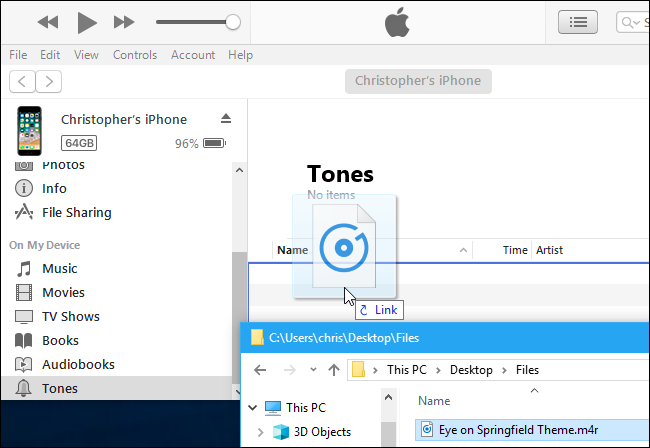
Now you have got the converted M4R file finally. If you want to send the ringtone to your iPhone, connect your iPhone to the PC via a USB cable. Find the option "Tones" under "Devices" in the right panel of iTunes, drag and drop the M4R file from your PC to this folder. Then you can find the M4R ringtone on your iPhone.
![Drag and drop the M4R file to iPhone]()
The Bottom Line
Here is all about how to convert a WAV file to an M4R file. With these two methods, you can convert a WAV audio file you keep on your PC to an iPhone ringtone easily. Try any of the tools and create a custom iPhone ringtone right now.
 NEW
NEW HOT
HOT