"I accidentally deleted my iTunes playlists, but they are still on my iPhone. How can I copy them to iTunes?"
Have you ever run into the same problem as stated above? If you do, don't fret. There are some practical methods you can use to transfer playlists from iPhone to iTunes successfully. Before proceeding, make sure you've had the latest version of iTunes installed on your computer. Then, have your iPhone prepared and follow our step-by-step instructions to transfer iPhone playlists to iTunes.
How to Transfer Playlists from iPhone to iTunes
The step of transferring playlists from iPhone to iTunes is fairly simple. During the process, you might encounter problems like iPhone can't connect to iTunes or iPhone playlists not showing up in iTunes issue. If you meet these problems, quick to fix them before moving on.
Step 1. Connect your iPhone to the computer and run iTunes.
Step 2. Under the "On My Device" section, choose "Playlist."
Step 3. From the right panel, select the playlist you want.
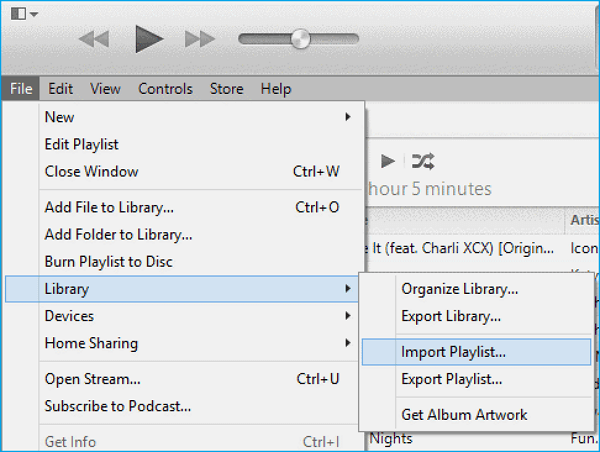
Step 4. Click "File" in the upper-left corner of iTunes > Choose "Library" > Choose "Export Playlist..." > Give the export file a name > Select "Save."
Step 5. Return to iTunes interface, select "File" in the upper-left corner of the screen > "Library" > "Import Playlist..." > Select the file you create.
![itunes-import-playlist]()
How to Export Playlists without iTunes
There is no direct way to export playlists without using iTunes. But you can achieve the same goal by directly exporting music from iPhone. To do this, you'll need a music transfer tool like EaseUS MobiMover to help. As a popular and practical iPhone data transfer tool, EaseUS MobiMover enables you to transfer data from iPhone to PC without effort. Apart from music, it also supports transferring contacts, messages, notes, calendars, etc.
Now, let's see how to transfer music from iPhone to Windows with EaseUS MobiMover.
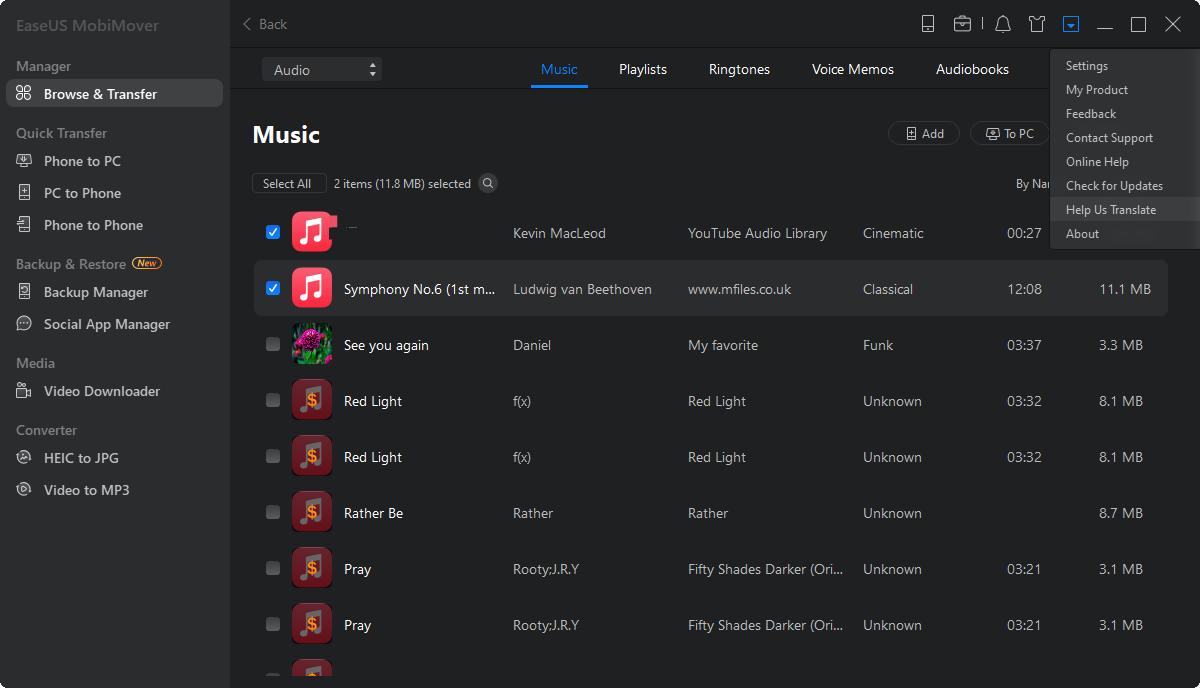
Step 1. Connect your iPhone to your PC/Mac and run EaseUS MobiMover > Tap "Trust" on your iPhone if asked > Click "Content Management" > Select "Audio" > "Music."
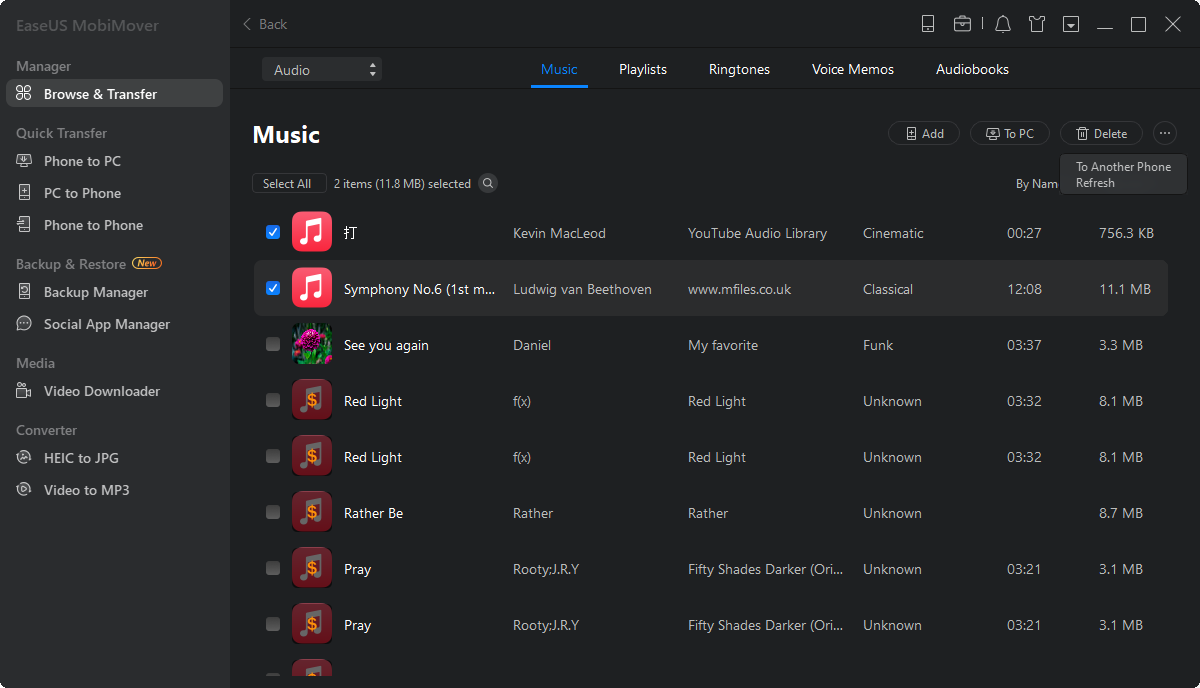
Step 2. Select desired songs that you want to transfer > Choose a safe location on your PC to transfer. You can also navigate a new and secure location on your PC to transfer and save the selected songs by clicking "Settings" at the right top corner.
Step 3. Click "Transfer to PC" to finish the process, and then wait patiently until the transfering process finishes.
In Conclusion
That's all about our guide on how to transfer playlists from iPhone to iTunes. As you see, the process is very simple. Apart from playlists, we guess that you may also want to transfer music from iPhone to iTunes or transfer other data to iTunes or computer. No matter what types of data you want to transfer, let EaseUS MobiMover help you do it quickly.
 NEW
NEW HOT
HOT