In this guide, you will learn three ways on how to transfer photo albums from iPhone/iPad to PC.
The photos on your iPhone or iPad take up a large part of your device storage. These photos generally include the pictures you took with your iPhone or iPad camera, the screenshots you took with your device, and the images you saved from the apps you use. To free up your device space or make a backup of these precious photos, you may want to transfer photo albums from your iPhone or iPad to PC. "How do I import photo albums from iPhone to Windows 10?", then you asked.
Actually, there are many ways to transfer photos from iPhone/iPad to computer, but not all of them allow you to copy photos by album. For transferring photo albums from iPhone or iPad to computer, here are the solutions:
| Methods |
Effectiveness |
Difficulty |
| 1️⃣EaseUS MobiMover |
High - It helps transfer all photos and albums at once or transfer specific files you've selected. |
Super easy |
| 2️⃣iCloud |
High -It helps sync your iPhone albums from iPhone to iCloud and allows you to download them to your computer. |
Easy |
| 3️⃣File Explorer |
Moderate - It is a built-in utility on Windows and allows you to transfer photos from your iPhone or iPad to PC. |
Easy |
| 4️⃣Photos App |
Moderate - It enables you to import photos from your iPhone or iPad to PC directly via a USB cable. |
Easy |
Part 1. How to Transfer Photo Albums from iPhone/iPad to PC All at Once
To transfer photos from your iPhone/iPad to PC (or Mac) by album, the reliable iPhone data transfer software - EaseUS MobiMover Pro will help. With it, you are able to transfer all photos and albums at once or copy pictures selectively according to your needs.
Besides, you can also transfer photos from PC to iPhone/iPad or sync photos from one iPhone/iPad to another using EaseUS MobiMover.
Other than photos, content like videos, music, ringtones, contacts, messages, voice memos, and more are also supported.
To transfer photo albums from iPhone/iPad to PC:
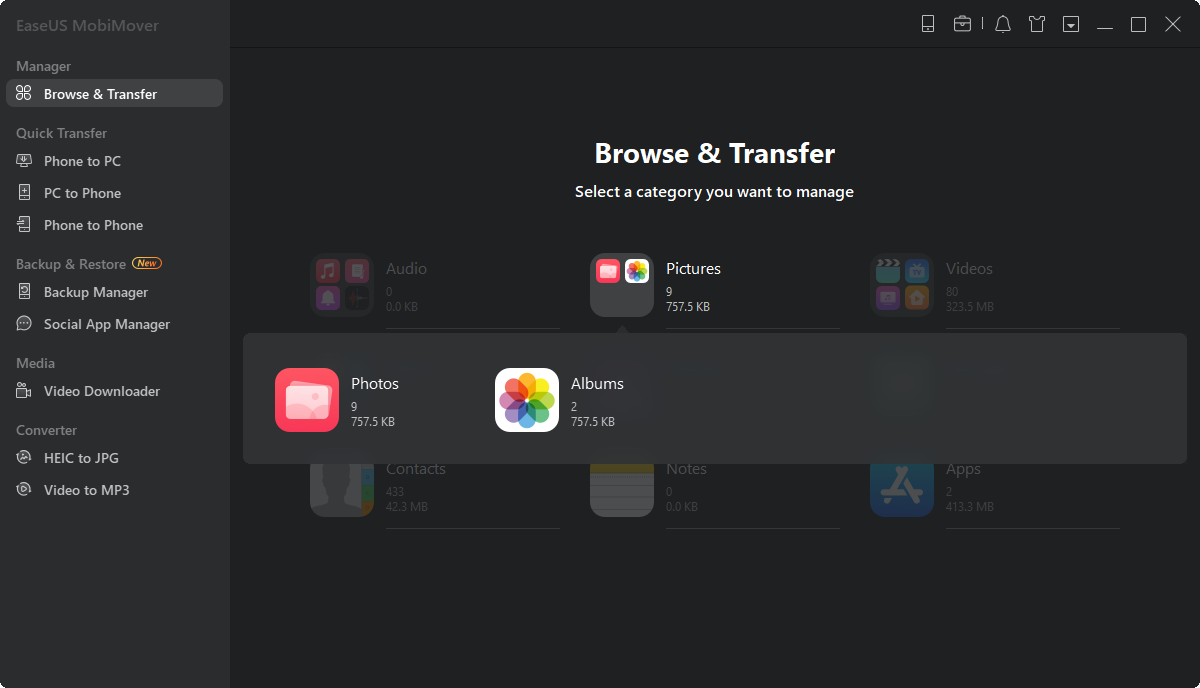
Step 1. Connect your iPad to your PC running Windows 7 and later. Start EaseUS MobiMover and go to "Pictures" > "Albums".
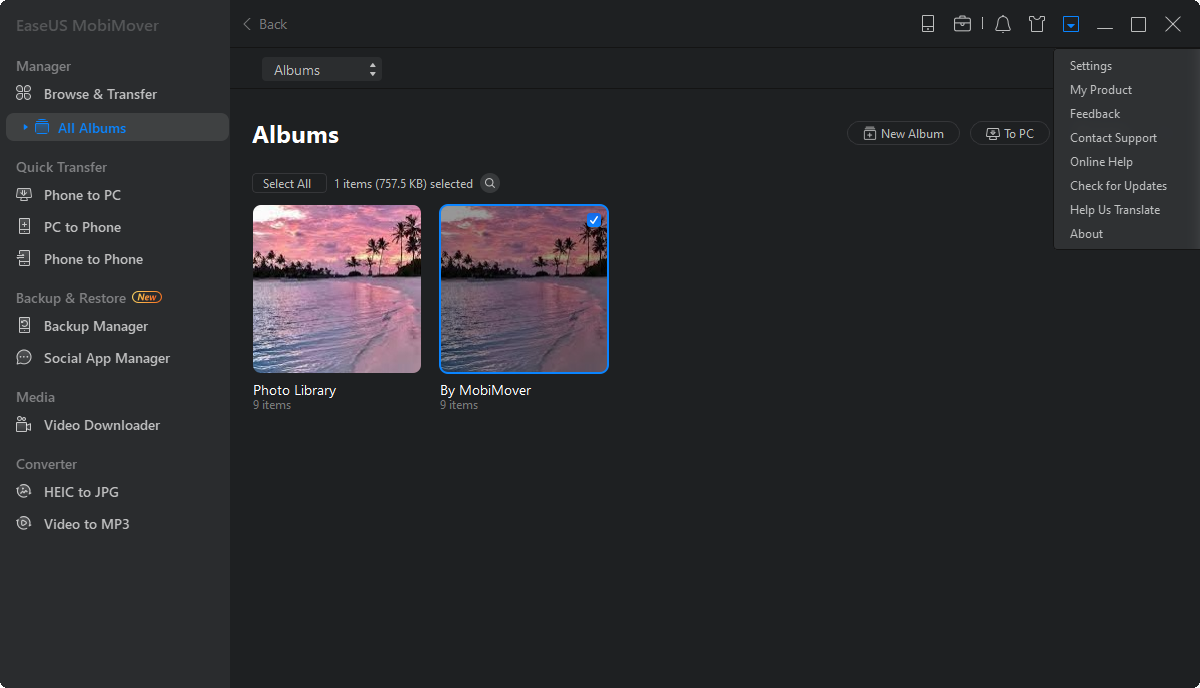
Step 2. Select the albums you'd like to copy from your iPad to PC. You can click the "Settings" option to customize the storage path for the exported albums on your computer.
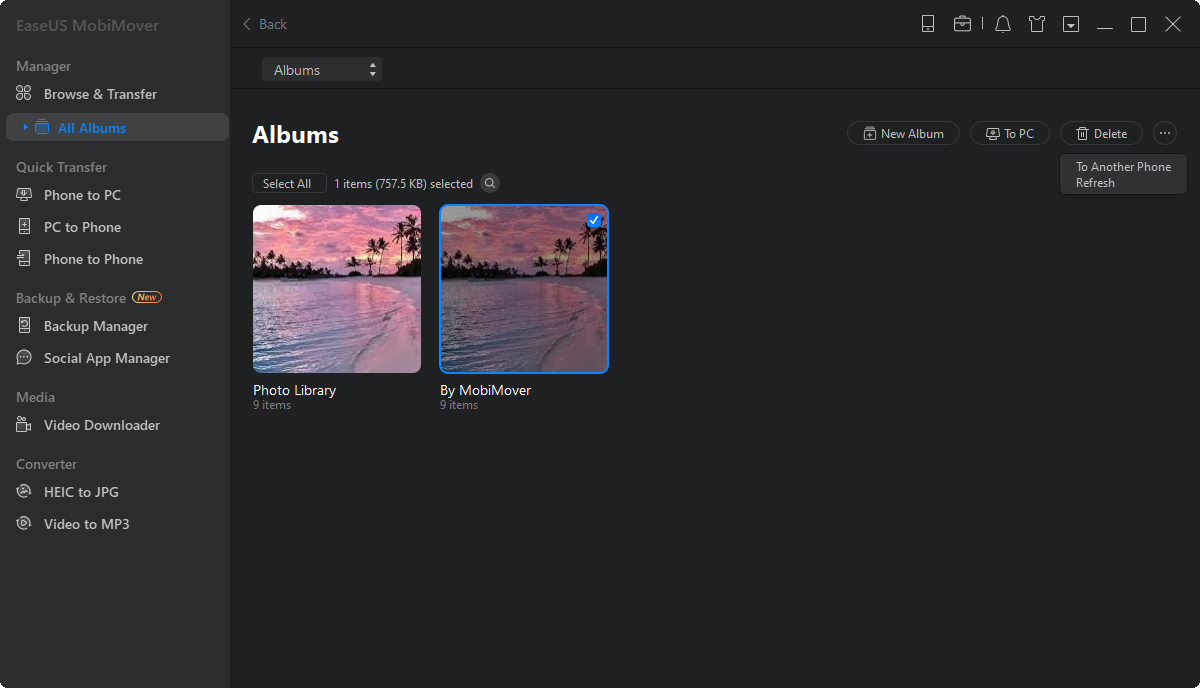
Step 3. Click the "Transfer to PC" button, and MobiMover will start transferring albums from your iPad to your PC automatically. When it has completed, go to the destination to check the files.
The powerful data transfer features are the main reasons why EaseUS MobiMover is so popular. But for some users, the amazing video download feature attracts them to get this tool. With that feature, you can download the online videos you like from websites to your computer or iPhone/iPad. Then you can watch the videos offline without buffering or when there is no network connection. Isn't it great? Get this versatile tool right now and make it your good helper.
Part 2. How to Transfer Photo Albums from iPhone/iPad to PC Wirelessly
If you prefer to transfer iPhone photos wirelessly without a USB cable, using iCloud is what you need. With iCloud on, you can sync your iPhone albums from iPhone to iCloud, afterward, you can download the photos in the albums to your computer.
To use iCloud, you need to make sure there is enough storage for you to store your entire photo library since iCloud sync all items and you have no chance to transfer pictures selectively. If not, you will fail to copy photos from your iPhone or iPad to computer as you want to.
To transfer iPhone/iPad photo albums to PC via iCloud:
Step 1. On your iPhone or iPad, go to "Settings" > [your name] > "iCloud" > "Photos" and turn on "iCloud Photos".
Step 2. On your PC, visit iCloud.com and sign in with your Apple ID. (Make sure you are using the same Apple ID as the one you use on your iPhone or iPad.)
Step 3. Choose "Photos" among the options and you will see all your iPhone photos and albums there. (iCloud photos are not syncing? Learn how to fix it with ease.)
Step 4. Select the photo album that contains the photos you want to transfer and then choose the pictures you want to copy.
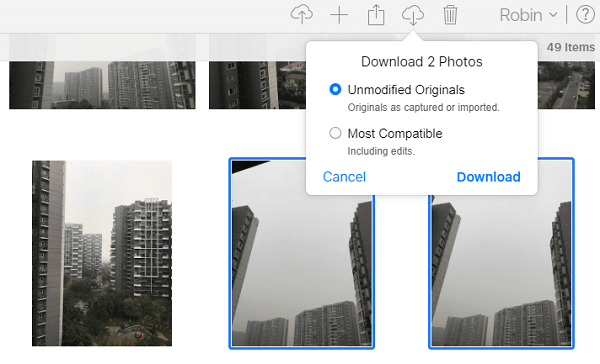
Step 5. Click the download button, choose to save the "Unmodified Originals" or "Most Compatible", then click "Download" to start transferring photos from your iPhone or iPad to the computer.
![How to transfer photo albums from iPhone or iPad to PC with iCloud]()
Part 3. How to Import Photos from iPhone/iPad to PC via File Explorer or Photos
If you don't mind transferring all photos at once (not grouped as different folders), you can import photos from your iPhone or iPad to PC directly via a USB cable, either using Windows Explorer (called File Explorer in Windows 10) or the Photos app (available in Windows 8 and Windows 10).
Both Windows Explorer and Photos are the built-in utilities on Windows and allow you to transfer photos from your iPhone or iPad to Windows PC. However, they can't copy photos by album, which means all your iPhone photos will be stored in a folder. If that's acceptable for you, follow the steps below to import photos from your iPhone or iPad to computer with a USB cable.
Option 1. Import Photos from iPhone to PC with File Explorer
Step 1. Connect your iDevice to computer.
Step 2. Unlock the device, trust the computer, and enter your password as asked.
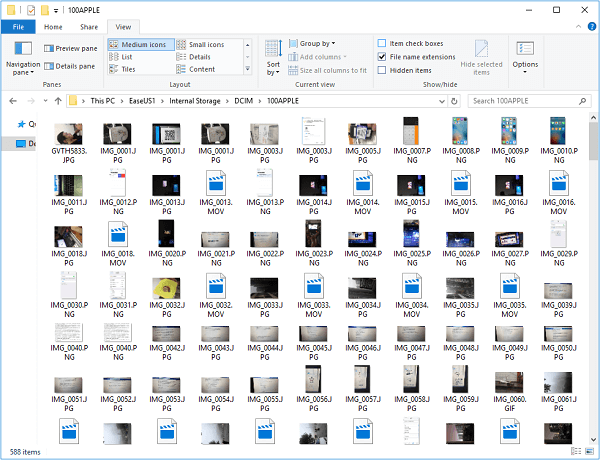
Step 3. Go to "This PC" > [your device name] > "Internal Storage" > "DCIM" > "100APPLE" and you will see your photos from your iPhone. (You can only see the photos taken by your iPhone/iPad camera or the screenshots. Images from other sources are not supported.)
Step 4. Copy and paste the photos from your iPhone or iPad to the computer.
![How to import photos from iPhone to computer via File Explorer]()
Option 2. Import Photos from iPhone/iPad to PC using Photos
Step 1. Connect your iPhone/iPad to your PC.
Step 2. Click "Allow" on your iDevice to trust the computer.
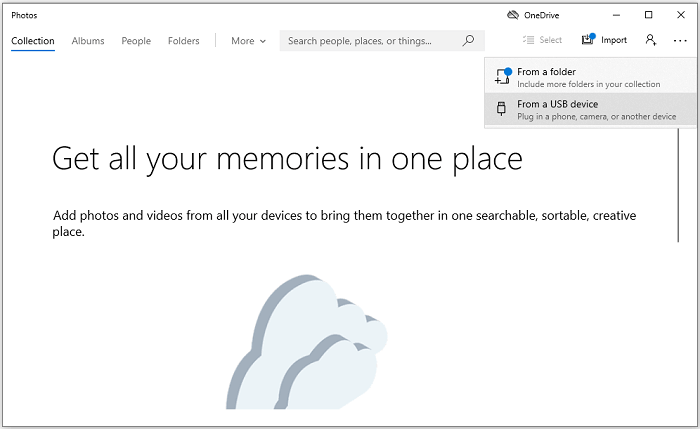
Step 3. Open the "Photos" app and click "Import".
Step 4. Click "From a USB device" from the drop-down menu and the app will look for a device to import photos from automatically. Afterward, it will show you how many items it has found.
Step 5. You can import selected items or import all the items it found according to your needs.
Step 6. Click "Continue" to start transferring photos on your iPhone/iPad to the PC.
![How to transfer photos from iPhone or iPad to PC with the Photos app]()
Conclusion
All of the three tips above allow you to get photos off your iPhone without iTunes. For you to make a better choice:
- If you want your photos to be well sorted, transferring photo albums using EaseUS MobiMover is the best option for you.
- If you like to send photos wirelessly, use iCloud or other cloud-based services.
- If you want to spare software installation, import photos from your iPhone or iPad to PC directly using Windows File Explorer or the photos app.
Carry out the method best suited to your needs to transfer iPhone/iPad photo albums to PC with ease.
FAQs on How to Transfer Photo Albums from iPhone or iPad to PC
Here are some frequently asked questions on how to transfer Photo Albums from iPhone or iPad to PC to assist you further:
1. Can I transfer photo albums from an iPad to a computer?
To transfer photo albums from iPad to computer, you may upload pictures and videos to your computer using the Photos app and a USB cable. With iCloud Photos, you can also make your photos accessible across all of your devices.
2. How do I sync albums from my iPhone to my computer?
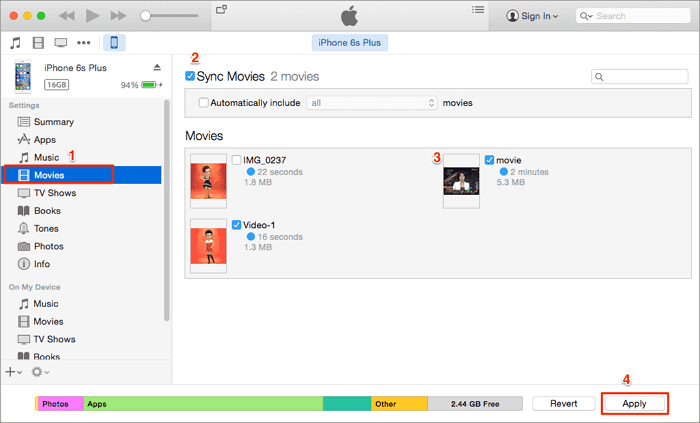
If you want to sync photo albums, you can use iCloud or iTunes to achieve this. Taking iTunes as an example, choose Sync Photos, then select an album from the pop-up menu.
3. How do I view Apple photo albums on my computer?
You may see your shared photo albums on your PC in the iCloud Shared Albums app after setting iCloud for Windows and turning on Shared Albums.
 NEW
NEW HOT
HOT