The next rejuvenated operating system Windows 11 (codenamed Sun Valley) has been finally revealed to be true. Windows 11 will reach every compatible computer since this Fall, and most of the devices are likely to receive the update starting from November. Windows 11 is another new round of free upgrades that needs downloading as soon as possible. Can old computers or laptops install Windows 11? What are the minimum hardware and system requirements for Windows 11? Is there a free Windows 11 update checker to use? Here, you can get everything you need to know to check update to Windows 11.
What are The Minimum System Requirements?
On the day Microsoft confirmed the Windows 11 OS rollout date, the most searched topics are mainly "Windows 11 requirements" and "Windows 11 compatibility checker". These are defacto the premises that will decide whether you can go straight to download the update after the final release, or you need to upgrade your hardware or even device to install the revamped OS.
Here's an overview of minimum system requirements
- Processor: 1 gigahertz (GHz) or faster with 2 or more cores on a compatible 64-bit processor or System on a Chip (SoC)
- Memory: 4 GB RAM
- Storage: 64 GB or larger storage device
- System firmware: UEFI, Secure Boot capable
- TPM: Trusted Platform Module (TPM) version 2.0
- Graphics card: DirectX 12 compatible graphics / WDDM 2.x
- Display: >9” with HD Resolution (720p)
- Internet connection: Microsoft account and internet connectivity required for setup for Windows 11 Home
How to Check If Your Computer Is Windows 11 Compatible
Lack of any one of the eight elements would disable you from getting the free Windows 11 upgrade. Microsoft offers a PC Health Check app to help you check if your current PC meets the requirements to run Windows 11, but it's not available to use yet.

The Windows 11 Upgrade Checker from EaseUS Software has already come out to help with an automatic Windows 11 compatibility check on your current PC and laptop. Visit the download page and install the software, and run it to quickly know whether your computer is ready for Windows 11 or not.
Step 1. Launch EaseUS Partition Master and click "Toolkit".
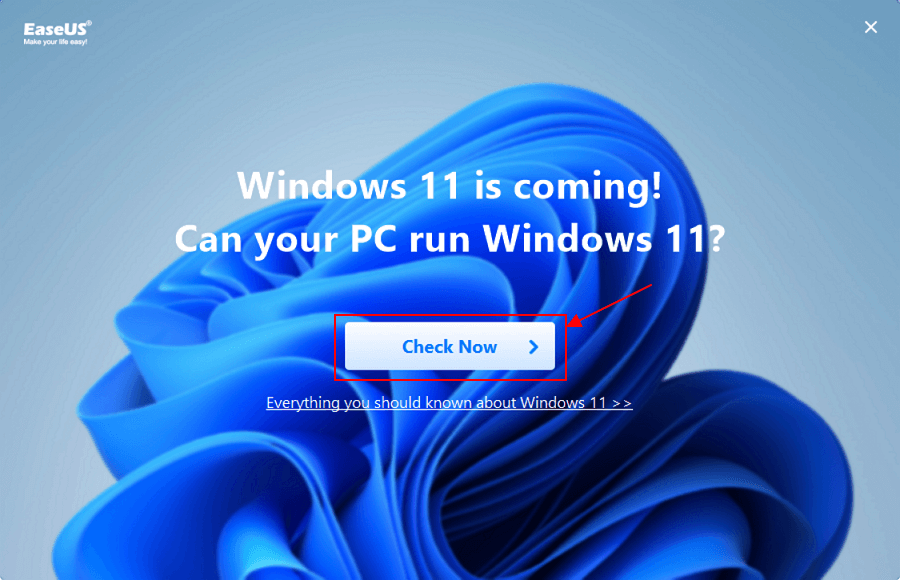
Step 2. Click "Win11 Checker" to open this feature. Then click the Check Now button to start.
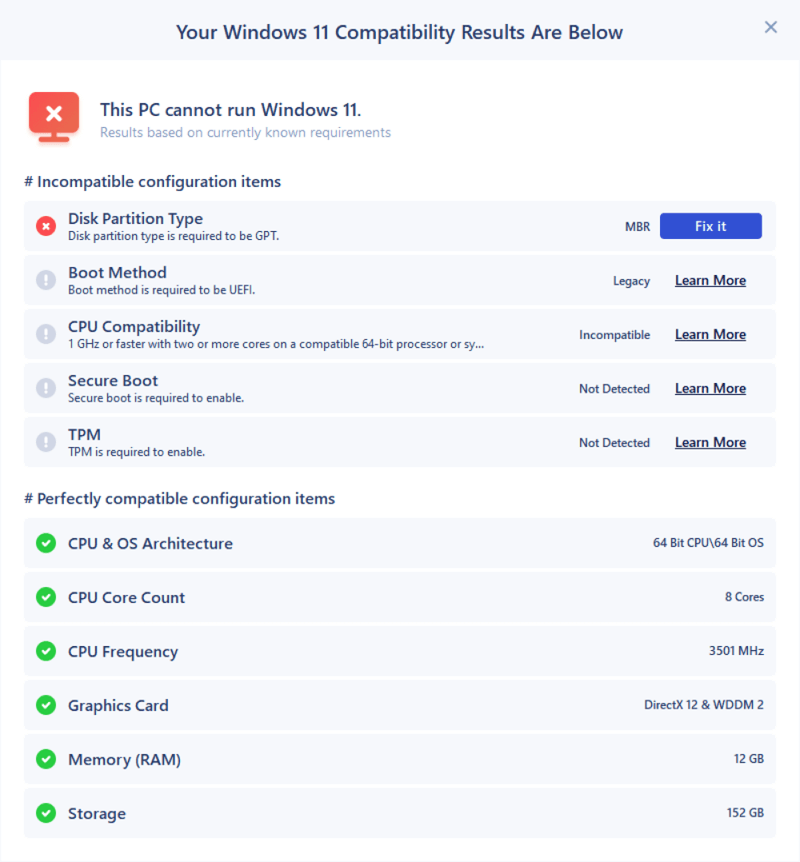
Step 3. The Windows 11 compatibility result window will soon appear. All the incompatible and compatible configuration items will be listed.
How to Check and Enable TPM 2.0 on Your Computer
After running the check, you may find that Microsoft's demanding for specific hardware, especially the TPM 2.0 is aggressive because many old devices are missing this part. TPM stands for Trusted Platform Module, which is a security feature for Windows to maintain platform integrity, facilitate disk encryption, store password and certificate. Microsoft made TPM 2.0 mandatory in the middle of 2016, like a year later after Windows 10 rolling out. Therefore, if your computer was bought before 2016, it's likely too old to have a TPM 2.0 chip nor support the Windows 11 update.
For post-2016 devices, we suggest owners follow the guide here to check if there is a TPM module on their motherboard. If the result is positive, go on learning how to enable the TPM 2.0 in BIOS, to get your computer ready for Windows 11 upgrade.
Step 1. Press Windows + R keys to bring up the Run box, type tpm.msc and hit Enter.

Step 2. Figure 1 hints at your computer is not equipped with a TPM chip, while the figure 2 means that it's ok to prepare your computer for Windows 11.

Figure 1: The result when you don't have a TPM module

Figure 2: The result when you have a TPM module
If the Upgrade Checker reports the TPM missing or disabled, but you do have a TPM 2.0 module on your motherboard, try to turn it on.
Step 3. Press and hold the required key* (DEL and F2 are the most popular hotkeys for PCs) while restarting your PC or laptop. This will help you access the firmware settings to enable the TPM chip on your computer during the boot process.
Common BIOS keys by brand you can refer to:
- Acer: F2 or DEL
- ASUS: F2 for all PCs, F2 or DEL for motherboards
- Dell: F2 or F12
- HP: ESC or F10
- Lenovo: F2 or Fn + F2
- Lenovo (Desktops): F1
- Lenovo (ThinkPads): Enter + F1.
- MSI: DEL for motherboards and PCs
- Microsoft Surface Tablets: Press and hold volume up button.
- Origin PC: F2
- Samsung: F2
- Sony: F1, F2, or F3
- Toshiba: F2
Step 4. Use the arrow keys to navigate to the Security tab and locate the option Trusted Platform Module (TPM) and press Enter.

Step 5. Select Enable from the drop-down menu.
Step 6. Save and exit the BIOS and restart your PC.
How to Enable UEFI Secure Boot on a Supported Computer
While for the system firmware requirement, Microsoft claims a UEFI secure boot. Together with the TPM 2.0, UEFI is also designed to improve Windows security on the whole. UEFI is a newer concept of firmware that is recognized as a successor and a refinement of old-aged Legacy BIOS, and it is gradually dominating the future firmware mode. So here it is, now Windows 11 makes the UEFI secure boot an essential element for upgrade.
Further reading: BIOS vs. UEFI: Difference and Conversion
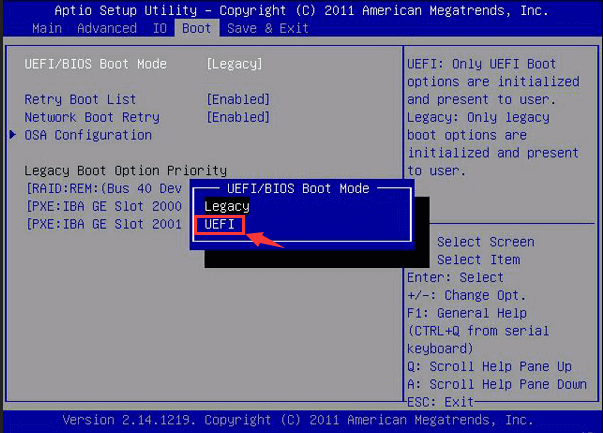
Modern OEM PCs mostly have support for UEFI firmware. Nonetheless, the EaseUS upgrade checker returns a report that quite a lot of computers are still using the Legacy BIOS settings, though its hardware is also UEFI compatible. For example, when you enter the BIOS settings (refer to Step 3 from Part 3) and navigate to the boot section, you can find that both Legacy and UEFI options are available.
Can you directly switch Legacy to UEFI to reach Windows 11? Since the boot loader for UEFI is based on a GPT disk, and that for Legacy BIOS is based on an MBR disk, you must convert the disk style from MBR to GPT at first.
Convert MBR to GPT
EaseUS Partition Master is the MBR to GPT conversion tool you're going to use. It's a comprehensive disk & partition management program that offers a package of practical solutions to adust disk space, merge or split partitions, copy or clone a drive, migrate OS from HDD to SSD, and the demanded solution here: to convert a disk from MBR and GPT in order to secure boot Windows 11 from the UEFI mode.
How to Change Legacy BIOS to UEFI
After the successful disk conversion from MBR to GPT with EaseUS Partition Master, now we need to enter the BIOS setup screen again to disable Legacy and enable UEFI and secure boot.
Step 1. Enter the BIOS setup utility again (refer to Step 3 from Part 3).
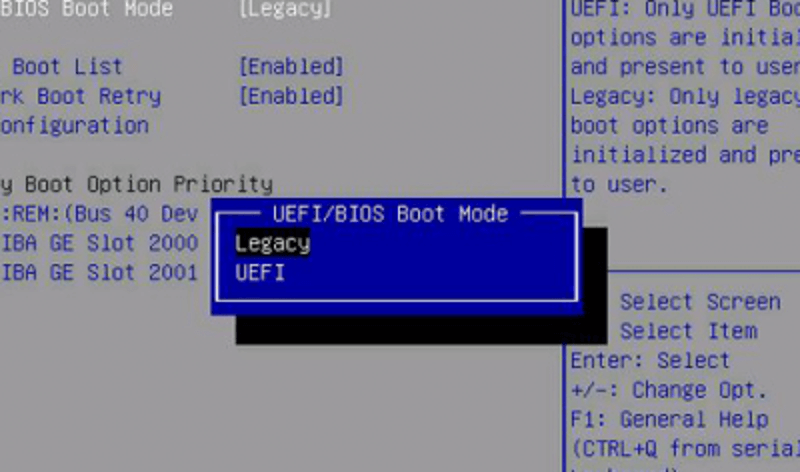
Step 2. Under the Boot tab, find the UEFI/BIOS Boot Mode. Use the up or down arrow key to choose the UEFI mode and press Enter. Save the change.
Step 3. Next, switch to either the Security tab, the Boot tab or the Authentication tab according to your own firmware interface, find the Secure Boot setting and set it to Enabled.
Was This Page Helpful?
Daisy is the Senior editor of the writing team for EaseUS. She has been working at EaseUS for over ten years, starting as a technical writer and moving on to being a team leader of the content group. As a professional author for over ten years, she writes a lot to help people overcome their tech troubles.
Jean is recognized as one of the most professional writers in EaseUS. She has kept improving her writing skills over the past 10 years and helped millions of her readers solve their tech problems on PC, Mac, and iOS devices.
Related Articles
-
How to Use iCloud, What Are iCloud Features | Ultimate Guide 2024
 Brithny/2024-01-11
 -
What Is Vmmem Process and How to Fix Issues with Vmmem Process
 Daisy/2024-01-11
 -
What Is Microsoft Identity Manager? Overview, Features & Deployment [Everything You Need]
Daisy/2024-01-11 -
Discord Hardware Acceleration: Everything You Need to Know
Daisy/2024-01-11
