- EaseUS Freeware
- Free Data Recovery Software
- Free Backup Software
- Free Partition Manager
Posted on Jan 14, 2016 by Tracy King to iPhone Data Recovery
- Summary:
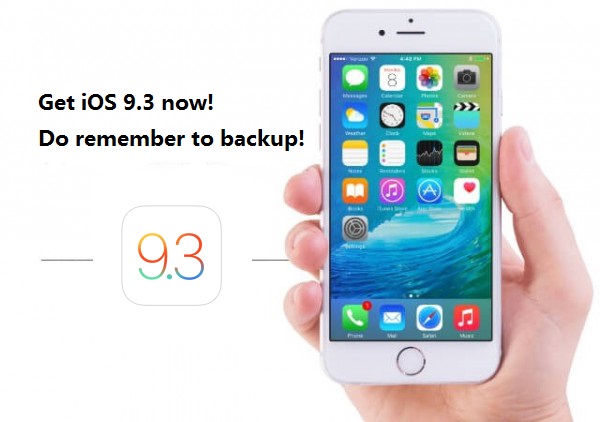
- If you are wondering whether you should update your iDevice to iOS 9.3, do it now. Here in this article, you’ll find reliable methods to update to iOS 9.3 without losing anything. You’ll keep all your previous data with the new iOS 9.3.
If you are trying to get a more smart iOS system on your iDevice, you can update to iOS 9.3 then. Night shift, smart education upgrades and 3D touch can improve your iDevice into a smart & cool equipment. Here in this article, you'll find reliable and secure methods to update to iOS 9.3 without losing anything. All your data will be safe.
Must-do thing before updating iDevice to iOS 9.3
So now iOS 9.3 is all available for iDevice users and you may want to update or install iOS 9.3 in your iDevice immediately. But before that, one must-do thing you need to do first. It is to backup iDevice data.
Yes, in order to avoid data loss trouble while updating to iOS 9.3, it is highly recommended for you to backup your personal contacts, text messages, calendar or notes even music files into iTunes or iCloud. If you have an iCloud account, it would be safer to backup all important data into iCloud.
Update to iOS 9.3 without losing anything
If you have backup all your data into iCloud or iTunes, then you can update your iDevice to iOS 9.3 now. Here the following are detail steps about how to update to iOS 9.3 without losing anything:
Step 1. Update iOS 9.3
Here we'll offer you three options for you to update iOS 9.3: OTA update, iTunes update and manual update.
OTA Update:
- 1. Connect your iDevice with WiFi network.
- 2. Go to: Settings > General > Software Update.
- 3. Download iOS 9.3 and let it automatically install and update in your iDevice.
Update via iTunes
1. Update iTunes to the latest version and plug iDevice into PC. Open iTunes.
2. When iDevice is detected, go to Device Summary.
3. Click Update and then choose Download and Update option.
4. iOS 9.3 will be downloaded and installed automatically.
Manually IPSW Installation
1. Download iOS 9.3 IPSW firmware files specific to your iDevice.
2. Repeat step 1 and step 2 in iTunes update.
3. Hold Shift key and simultaneously click Restore iPad/ iPhone/ iPod option.
4. Select previously downloaded IPSW firmware files and then iTunes will install iOS 9.3 on your iDevice. Reboot and come to new iOS 9.2 Hello screen.
Step 2. Recover backups from iCloud after updating to iOS 9.3
After updating iOS 9.3, you'll have one last thing to do. Remember? It is to recover your backups from iTunes or iCloud to your iDevice. Here the following we'll also recommend you two methods to recovery backups: recover from iCloud to iDevice directly and recover backups thoroughly from iCloud with iDevice with iOS data recovery software.
Method 1. Recover iCloud backups to iDevice directly
1. Turn on your iOS device.
2. In the Setup Assistant, proceed to "Set up your device," tap Restore from a Backup, then sign in to iCloud.
3. Proceed to "Choose backup", then choose from a list of available backups in iCloud.
Sometimes, iCloud recovery may not get all your backups back. Some users feedback that their text messages are not all back. Therefore, here we recommend you another complete and powerful iOS data recovery software - EaseUS MobiSaver to help you recover backups completely from iCloud.
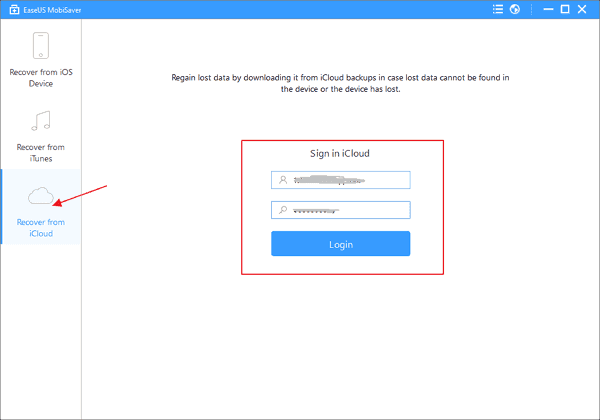
Method 2. Use EaseUS MobiSaver to thoroughly recover backups from iCloud after updating to iOS 9.3
EaseUS MobiSaver supports all iOS devices and allows to restore all data and backups from iCloud, iDevices and even iTunes. Here we'll show you how to recover from iCloud.
Step 1. Download and launch EaseUS MobiSaver on your PC. Connect your iDevice with it.
Choose recovery mode: "Recover from iCloud Backup" and sign in iCloud.
Step 2. Scan the iCloud to find out all the data.
Select your iCloud backup file and wait patiently until the app finds & displays all your data after finished scanning the iCloud. It may take a while, just depends on the number of files in your iCloud.
Step 3. Preview and export found data from iCloud to PC
Click the correct file type on the left side to preview all the files one by one.
Mark the files that you want and click "Recover" button to get all of them back once.
Specify a folder on the computer to save all the data to your PC.

Then you can import found data into iDevice with a third-party tool and enjoy new iOS 9.3 now.
Related Articles - ALSO ON EaseUS SOFTWARE
-
How to Recover iPhone Data after Restore without Backup
2014-01-23 17:21:23

Abby Haines - Data loss after the restore! Try EaseUS MobiSaver to gain a chance to recover iPhone data after restore without backup. …
-
[Solved] iPhone Keeps Freezing After Update iOS 12/11.3/11
2018-06-05 15:12:48

Brithny - iPhone keeps freezing and crashing after iOS 12/11.3/11 update! Read this article and find solutions on how to fix iPhon…
-
How to Backup and Restore Data from iPhone with Broken Screen?
2017-04-07 16:42:34

Tracy King - This tutorial article provides you direct solutions to backup, transfer and restore data from iPhone with broken screen.…
-
IMO chat recovery: Recover IMO Chat History/Messages
2016-11-11 16:56:55
Abby Haines - Deleted chat history in IMO app? Try third-party IMO chat recovery software to recover deleted or lost IMO.IM chat histo…